My Guide to Photographing White-Tailed Eagles
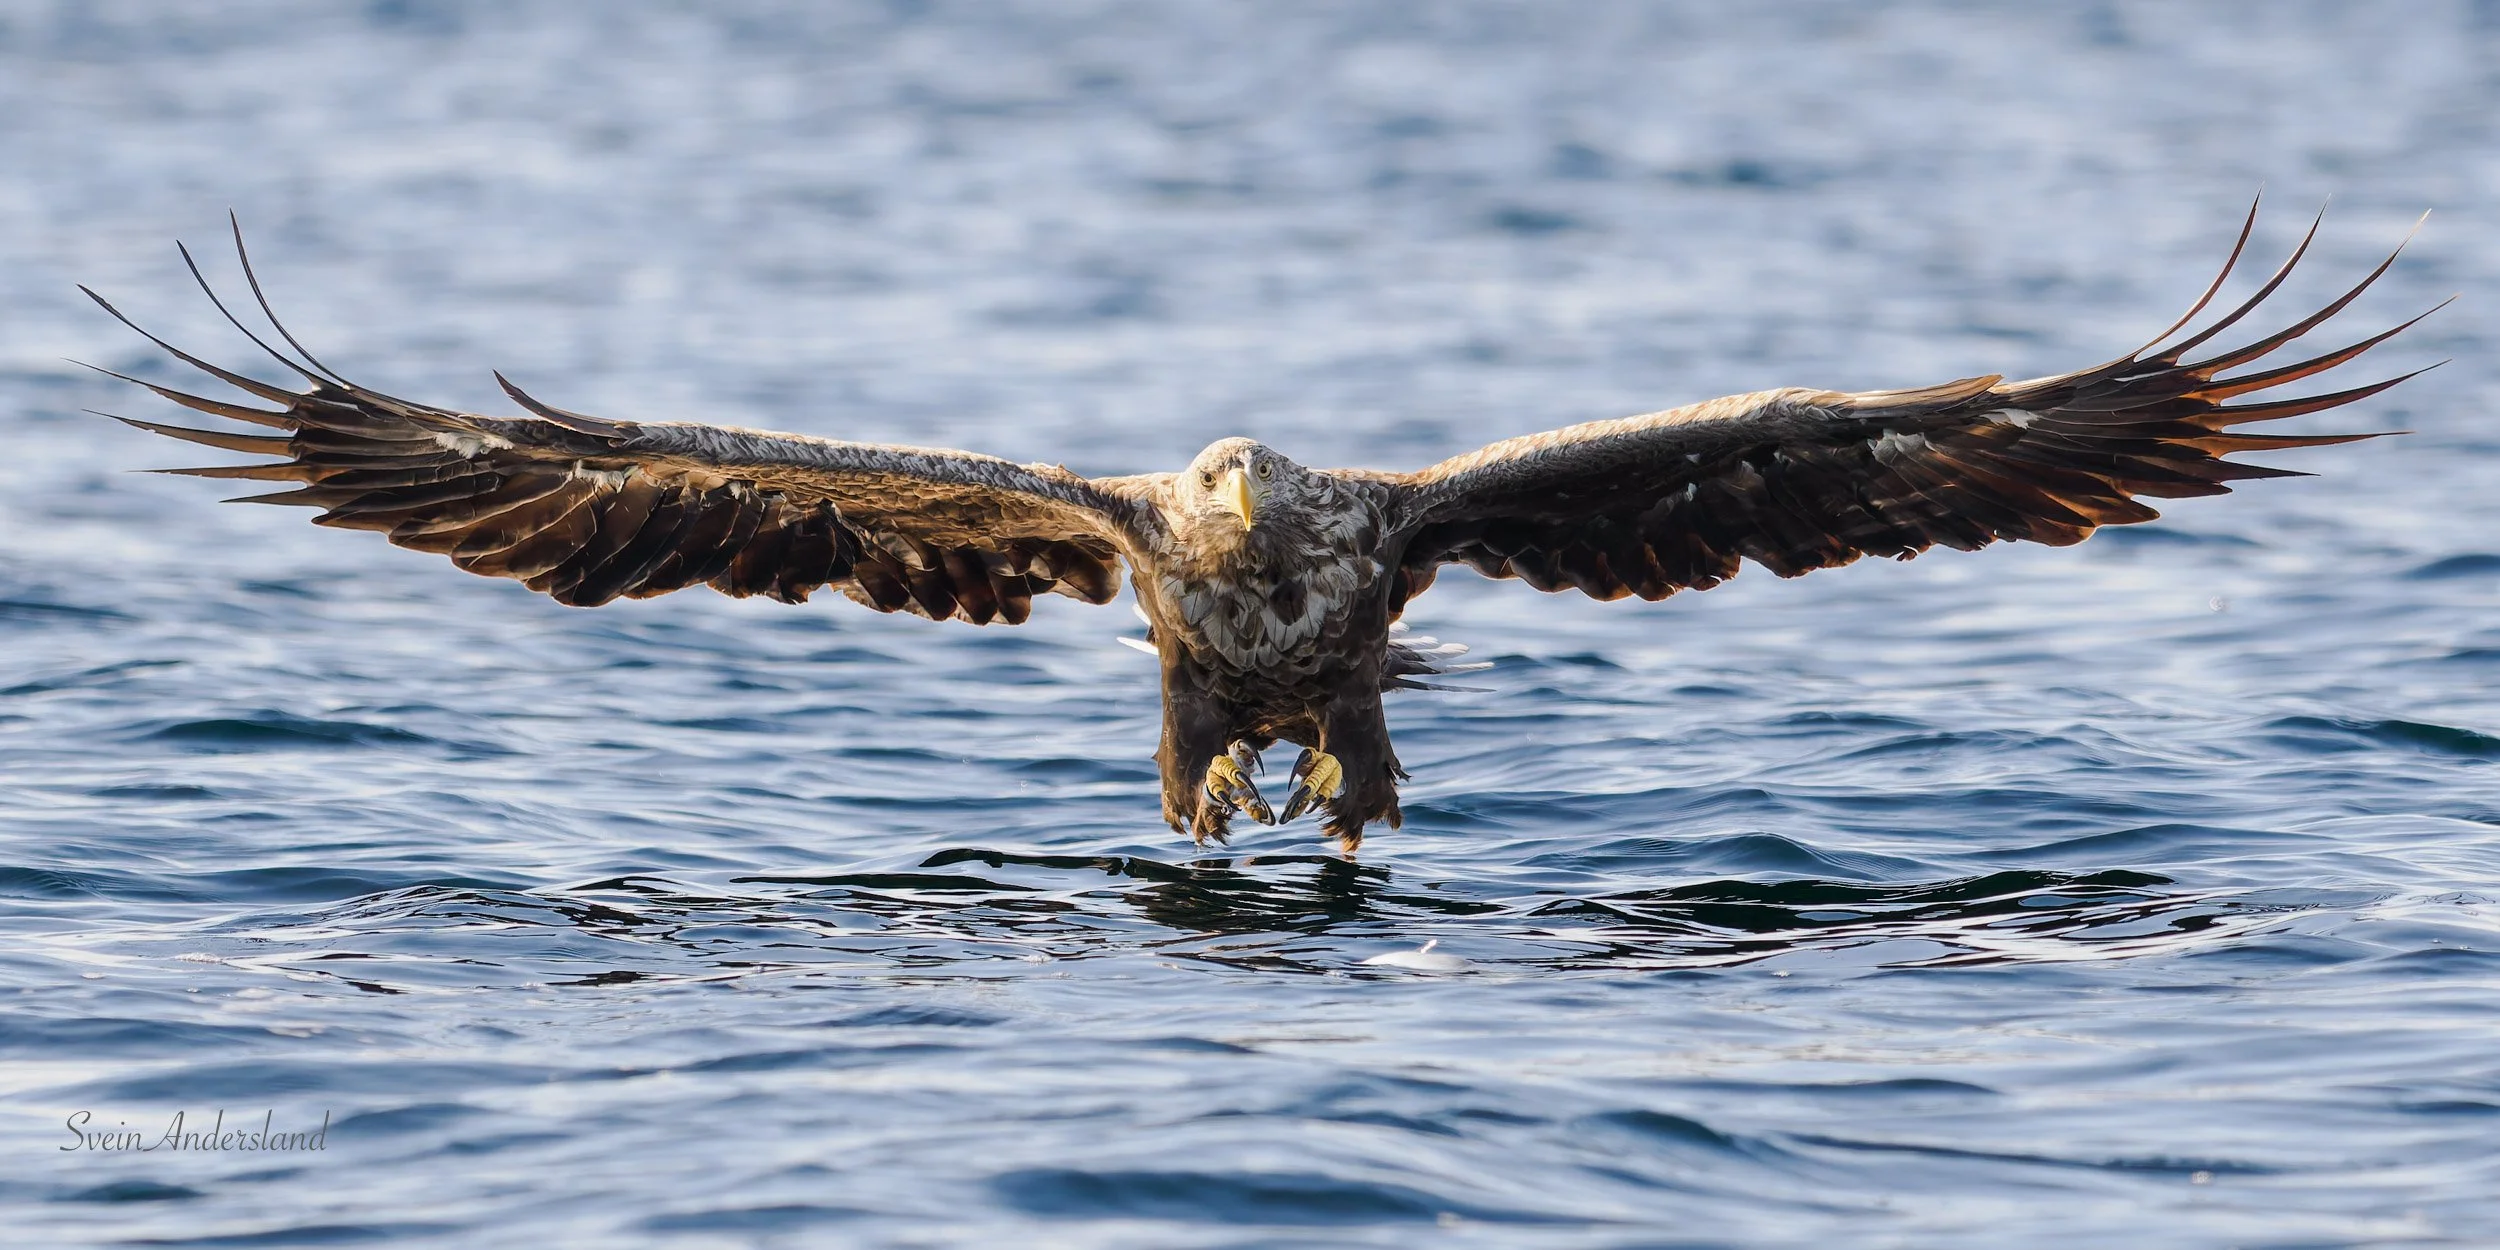
This article is based on my experiences with white-tailed eagle (sea eagle) photography. What does a typical boat trip for sea eagle watching look like? What is smart to plan and keep in mind? What kind of photo equipment is used, and how is it set up for sea eagle photography?
The guide is primarily aimed at nature photographers, but it also includes sections that may be interesting even if you're not a photographer. Among other things, the article provides insight into what it takes to capture a good image of a white-tailed eagle.
I seriously began working with white-tailed eagles as a photo project in the spring of 2022, after having considered for some time getting to know the eagles and photographing them in the local area in Sunnhordland, on the west coast of Norway. In the three years since, there have been many eagle encounters, and new eagle pairs have been added to the visit list. The white-tailed eagle population is increasing, and this is noticeable in this part of Norway as well.
The guide is divided into the following main sections:
Photo equipment brought on the boat
Photography techniques and other things to remember on the boat
Optimizing sea eagle photography
Variations in subjects and lighting
Fishing equipment
Conclusion
The review of photo equipment is specific to Olympus/OM System, but the principles are relevant for other camera brands as well. The discussion of other photography techniques is independent of camera brand. It’s always useful to know your own camera system inside and out.
The article was last updated on April 8, 2025, please see section on ISO-Auto.
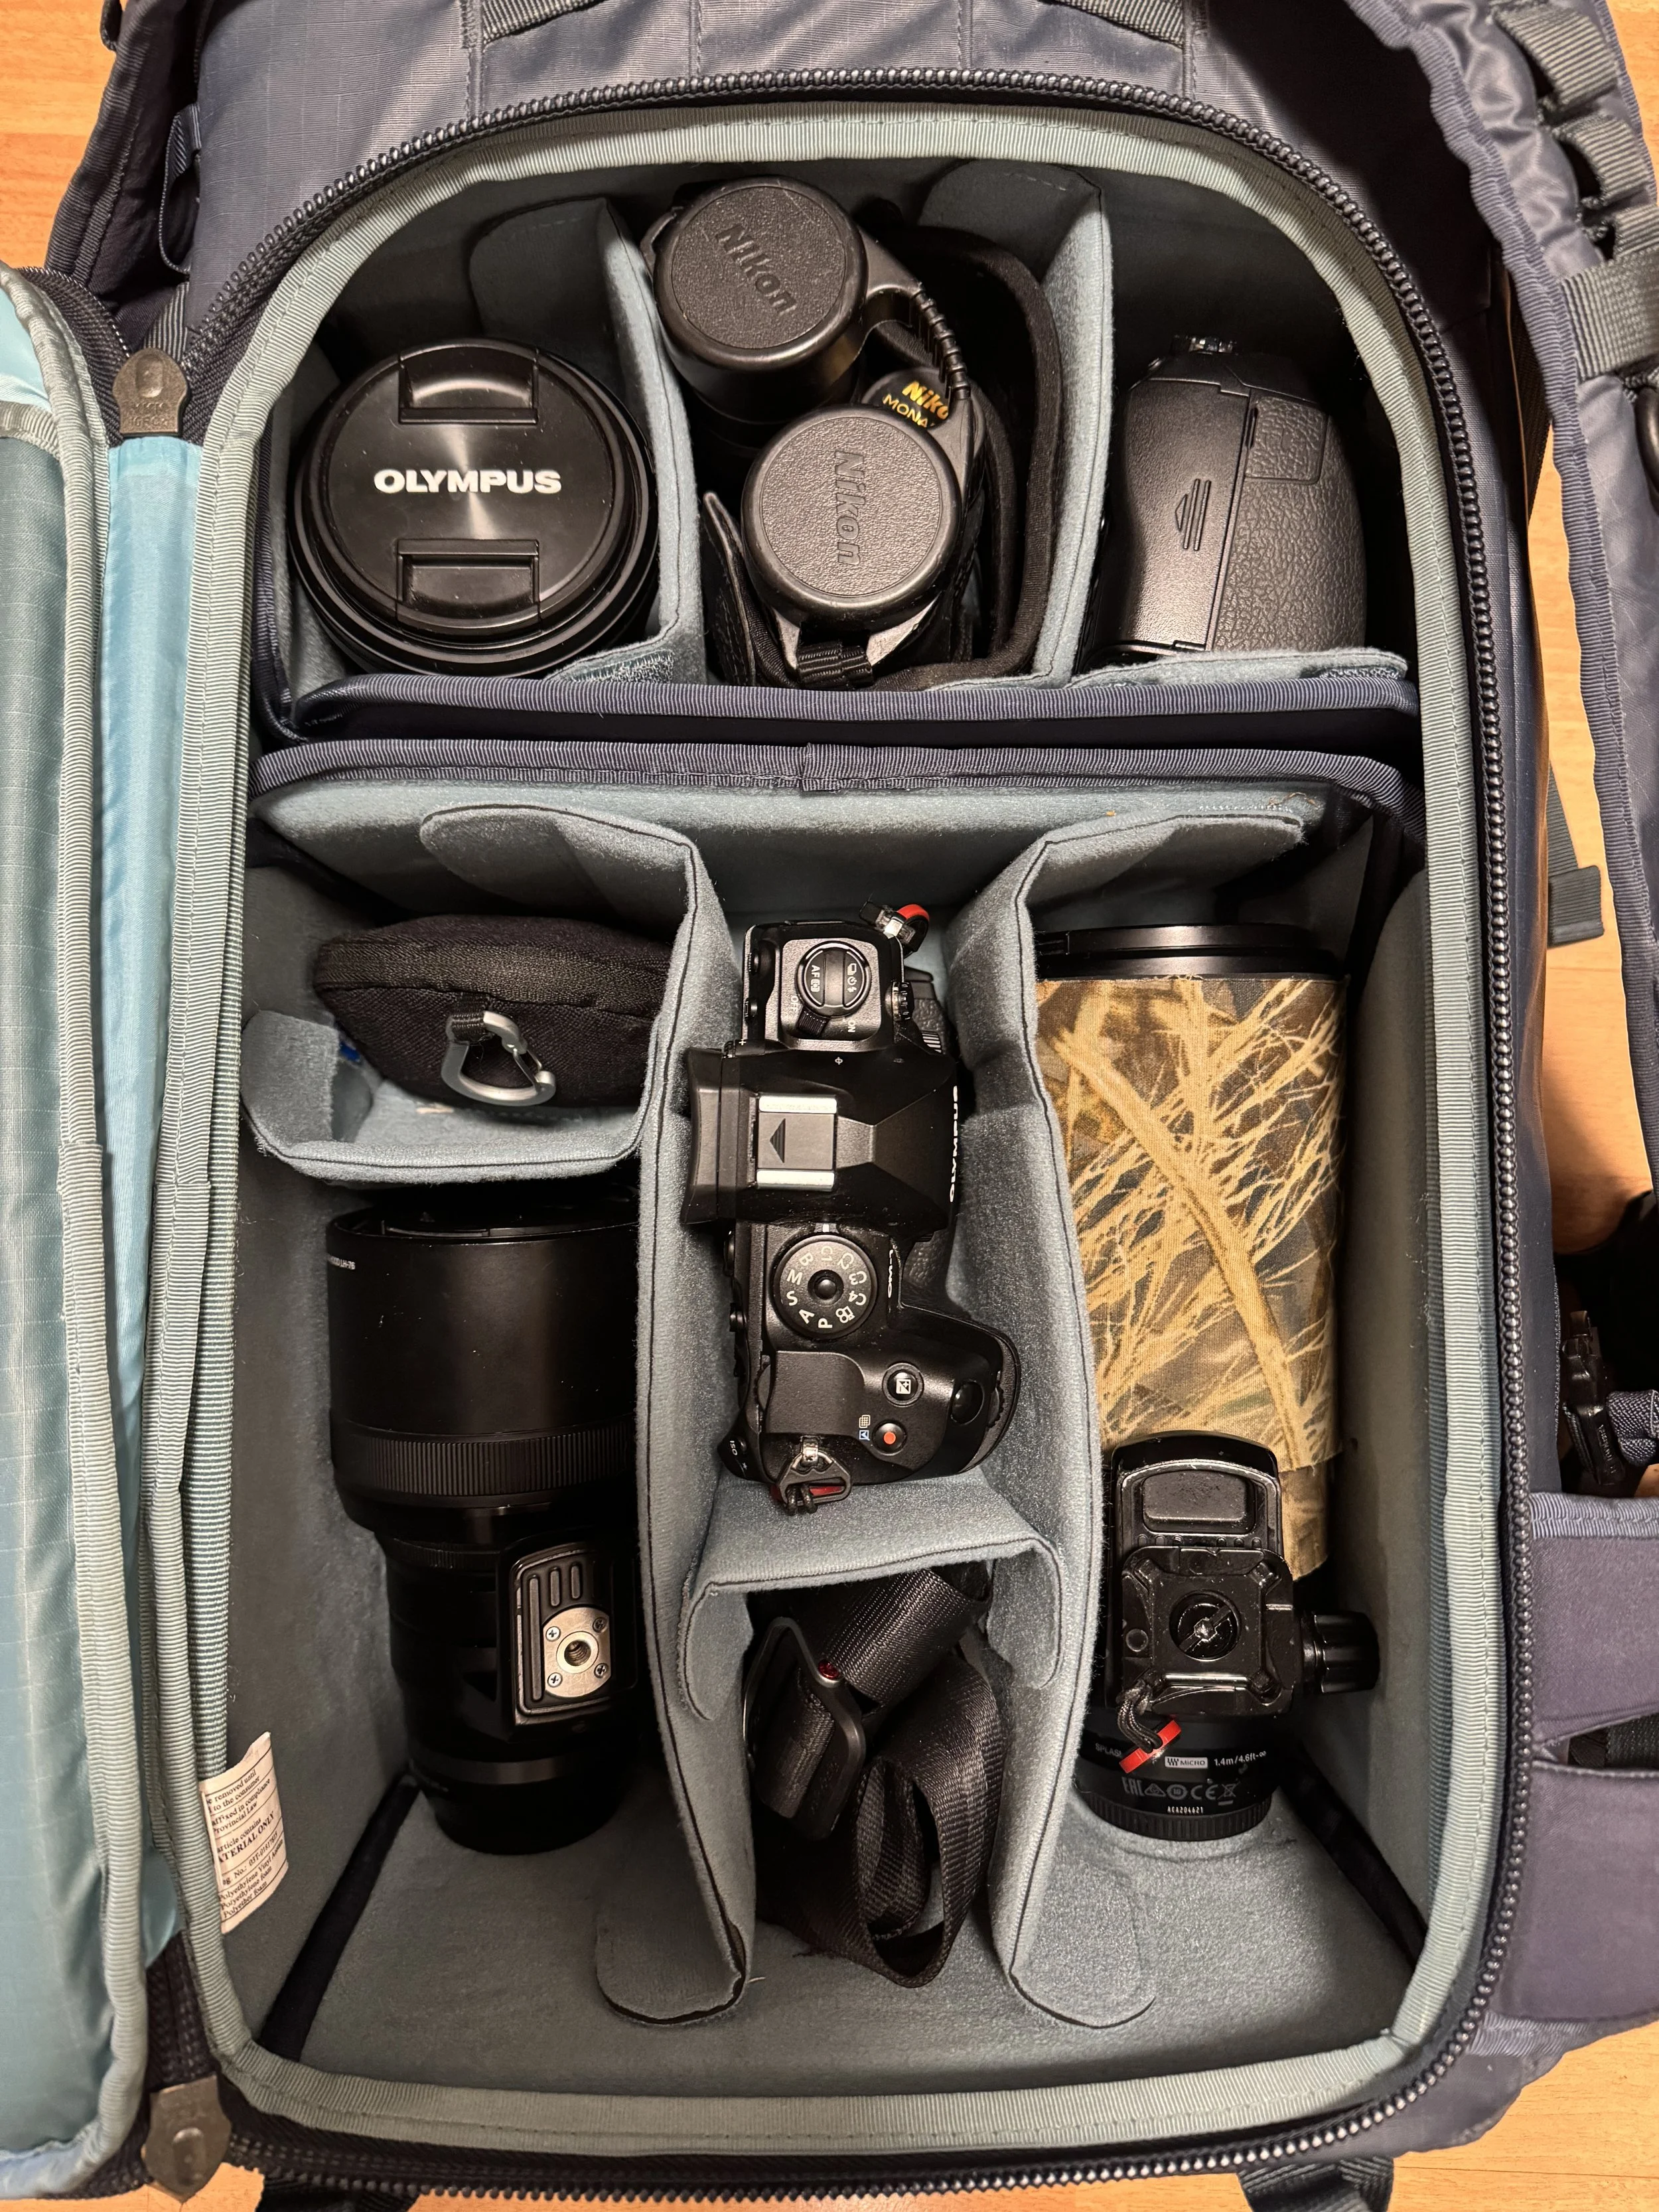
My Shimoda photo backpack packed for a sea eagle trip. Space has been made for the second backup camera, the Olympus OM-D E-M1 II.
Photo Equipment Brought on the Boat
Camera Body
In my camera backpack, the Olympus OM-1 has been the workhorse since the second half of 2022. Much could be written about the camera body itself, but here I focus on what’s relevant for white-tailed eagle photography.
In this article, both Olympus and OM System are mentioned. The reason is that Olympus spun off its camera division in 2020, and the new company OM Digital Solutions (OMDS) has carried the proud Olympus legacy forward. The OM-1, launched in February 2022, is the last camera to bear the Olympus name. For someone who has used Olympus since 1979, that’s a bit bittersweet— but there’s nothing to be done. OM System seems to be thriving.
The OM-1 is, in many ways, an ideal camera for bird photography. It’s compact, has a high shooting speed, and lightning-fast autofocus with bird recognition that works extremely well. Amateur Photographer recently named its successor, the OM-1 Mark II, as the “Best camera for bird photography overall.”
In the following sections, I’ll go through some features that are particularly useful for me as a nature and sea eagle photographer.
Image Sequences
The OM-1 can shoot up to 50 frames per second with autofocus and 120 frames per second with focus locked on the first frame. For this type of photography, I’ve chosen the SH2 mode with 25 frames per second, which is sufficient to capture the nuances when things happen. SH2 also ensures flicker-free recording in the electronic viewfinder. It’s a major advantage to be able to follow the eagle uninterrupted in the viewfinder while the shutter button is active.
Buffer Memory
The buffer can store 93 RAW files before the camera needs more time to transfer the files to the memory card. This allows for 3.7 seconds of shooting at 25 fps. It’s tempting to consider the upgraded version, the OM-1 Mark II, which was released in 2024. It has a buffer capacity of 205 RAW files. The OM-1 works well today, but for this specific type of photography, the expanded buffer capacity of the OM-1 Mark II would make a noticeable difference.
Image Stabilizer
The OM-1 has an excellent image stabilizer, where Olympus/OM System has long been best in class. Stabilization is further enhanced when combined with stabilized lenses such as the 300mm f/4 PRO. More on this further down. This is especially useful when the sea eagle is stationary and I can significantly reduce the shutter speed, even though the boat isn’t perfectly still.
Weather Sealing
The camera has an IP53 rating for weather sealing, which is unique to OM System. This means that the camera and similarly weather-sealed lenses can withstand hours of rain, sea spray, sandstorms, and even mud baths. You can simply rinse the equipment under running water. Digital Camera World confirmed in a December 2024 article that among camera manufacturers, only OM System provides this type of rating. If you're still in doubt, take a look at this YouTube video showing the extreme stress test the OM-1 is subjected to.
My backup camera is primarily the Olympus OM-D E-M1X. I used it during the first white-tailed eagle season in 2022, and it delivered many excellent images. The autofocus is lightning-fast, although the bird recognition doesn’t quite match that of the OM-1. Ergonomically, it’s nearly perfect and balances a telephoto lens brilliantly.
Lenses and Other Accessories
On my white-tailed eagle trips, I bring three lenses, all from the professional division of OM System, marked as PRO in the lens name. Zuiko is the lens brand formerly associated with Olympus and now with OM System, known for its high-quality optics. In Japanese, Zuiko means “light of happiness” or “fortunate light.” A good lens is just as important as a good camera body — perhaps even more so.
M.Zuiko 300mm f/4 PRO
This is a fantastically sharp lens with excellent light-gathering ability and built-in image stabilization that works in tandem with the camera’s stabilization system — equivalent to 8 stops. I’ve taken sharp images with exposure times around 1 second using this lens — though of course, not of an sea eagle in flight! This is my workhorse for wildlife and bird photography, and it never disappoints. It’s razor-sharp across the entire image frame, even at the wide-open aperture of f/4. With a good minimum focusing distance, it can also be used for macro photography.
Thanks to the Micro Four Thirds (M43) standard, this superb lens is relatively lightweight — 1270 grams without and 1475 grams with the tripod adapter. It’s easy to handhold during 5–7 hour photo sessions on the boat, where I often return home with two to three thousand images on the memory card. I would never have the stamina to work handheld with a full-frame 600mm f/4 lens on the boat.
One advantage of the f/4 aperture on M43 is the greater depth of field at maximum aperture. F/4 on M43 gives the same depth of field as f/8 on full-frame, ensuring the entire bird is in focus without needing to stop down and lose light. It’s always beneficial to avoid increasing the ISO.
A downside is that it’s a prime lens, and therefore less flexible than a telephoto zoom. As I’ll discuss further down, it’s a challenge to estimate the distance from the boat to where the sea eagle picks up the fish. A telephoto zoom would make you less dependent on getting the exact distance between the boat and the fish in the water.
M.Zuiko 40–150mm f/2.8 PRO
This is one of my absolute favorite lenses — fantastically sharp, compact, and bright, with a maximum aperture of f/2.8. For example, I’ve used it extensively for indoor photography of volleyball matches. On white-tailed eagle trips, it’s used less frequently, but it’s great to have when the eagle arrives so quickly that I don’t have time to get enough distance from the fish. That happened, for instance, when Ottar picked up 10 fish in rapid succession, as described in this blog post (in Norwegian, but the pictures tell the story). I had to switch from the 300mm to the 40–150mm simply because I didn’t have time to move the boat far enough before Ottar was in position.
The lens also served as a substitute last spring when the 300mm fell to the deck and had to be sent to OM System’s European repair facility in Portugal. That opened up the opportunity for me to experiment more with filming eagles.
The 40–150mm is also compatible with the MC-14 teleconverter, which I’ll discuss further down. With the converter, it becomes a 210mm f/4 lens (equivalent to 420mm in full-frame terms).
M.Zuiko 12–100mm f/4 PRO
This lens is in my camera bag in case a landscape scene appears along the way — like it did one summer evening in 2024, see image below. It’s another sharp and versatile favorite, and also an excellent all-around travel lens.
The 12–100mm f/4 was great to have for capturing this evening light that broke through an opening in the west. The light had been gray throughout the day, but I was hopeful that a band of light would open up just before sunset.
Teleconverter and Other Equipment
The MC-14 teleconverter is compatible with both the 300mm f/4 PRO and the 40–150mm f/2.8 PRO, and provides a 1.4x magnification. With the teleconverter attached, the 300mm f/4 becomes a 420mm f/5.6 lens. When using the teleconverter, sharpness at full aperture is slightly reduced, so I usually stop down one stop to f/6.3. The 300mm + MC-14 combination is useful when, for example, the eagle is sitting still on land and I can get a bit closer to the subject. A handheld field of view equivalent to 840mm in full-frame continues to impress me with this system.
I purchased the HLD-10 battery grip in 2024, thanks to an irresistible half-price campaign from OM System. The grip improves balance between the camera and the 300mm lens. It adds a bit of weight, but to avoid even more, I don’t keep a battery in the grip.
The total weight of the OM-1 + 300mm f/4 combination is 2074 grams. It’s manageable to wear around the neck and handhold for extended periods.
Among other gear, I also bring a good pair of binoculars — Nikon Monarch 5. It’s absolutely essential to have quality binoculars to spot white-tailed eagles and other birds that may pass by.
Camera Settings for White-Tailed Eagle Photography
EXPOSURE SETTINGS
My standard settings for eagle photography are manual (M) exposure, with a fixed aperture of f/4 and shutter speeds typically between 1/2000–1/3200s, most often 1/2500s. The ISO value has then been manually adjusted according to the lighting conditions. In 2025, I’ve started experimenting with Auto ISO in combination with shutter priority mode (S) — see next point.
ISO-AUTO
With ISO-Auto, the aperture and shutter speed remain constant, while the ISO value automatically adjusts according to the lighting conditions. This ensures more accurate exposure under changing light conditions. The standard upper and lower ISO limits are set to the range ISO 200–6400. Exposure compensation is then performed by over- or underexposing during shooting, by turning the front dial operated by the index finger.
I have never cracked the code with ISO-AUTO in manual mode (M), partly because the camera ignores the lower ISO limit I have set to 200. In M mode, the camera can still choose ISO 80 or 100, which reduces dynamic range and therefore lowers image quality. Then I discovered by chance that in shutter priority mode (S), the ISO value stops at 200 as it should, and my ISO problem was basically solved, I thought…see next section.
EDIT April 8, 2025: I have to take back that S mode stops the lower ISO value at 200. Experience from the trip on April 2 showed that the camera still chose ISO 80 during shooting. My earlier testing did not provoke such a result. One alternative is to set the minimum shutter speed for when the camera will increase the ISO value. For sea eagle photography, that would be 1/2000s. The problem is that this only applies to P and A modes. Therefore, it comes back to using manual exposure mode, with fixed ISO throughout the shoot and adjusting exposure along the way by changing the shutter speed. Please contact me if you have a solution to this problem, or if there is something I have over looked.
LIGHT METERING
The standard has been ESP, meaning matrix metering across the entire image area. I have now switched to center-weighted metering to prioritize the main subject, which in this case is a relatively large sea eagle. In combination with ISO-Auto, this can help optimize exposure metering during the shoot.
AUTO FOCUS
C-AF with bird detection. The focus area is manually set up — see the figure of the Super Control Panel below. C-AF sensitivity is set to 0. For a while, it was set to +2, but that likely made the autofocus a bit too aggressive, increasing the risk of blurred images precisely when the sea eagle slows down as it picks up the fish from the water. Thanks to OM System ambassador Kai Jensen for the input on this.

Another trick in the photo playbook is to quickly switch between focus areas. For this type of photography, there is a constant shift between a sea eagle in flight and stationary on land. When the eagle is on land — either on the ground or, more often, in a tree — I want a limited, center-positioned focus point. Therefore, I use the selector dial surrounding the AEL button on the back, easily accessible with my right thumb. In position 1, I have set a larger focus area for flight, while position 2 is programmed for a small focus point in the center.
CONTINUOUS SHOOTING
High-speed series SH2 set to 25 fps, with autofocus between each frame. It’s also possible to choose 50 fps in this mode, but for me 25 fps is sufficient to capture the action.
IMAGE STABILIZATION
Until now, I have used the S-IS1 setting, meaning the camera compensates for movements in all directions. After a tip from OM System ambassador Jo Stenersen, I switched in February this year to S-IS2, which provides only vertical stabilization. This means you hold the camera horizontally and shoot while panning horizontally. Theoretically — and hopefully in practice — this can make autofocus even more stable when the sea eagle picks up the fish.
AF LIMIT
The camera has three preset distance ranges. For sea eagle photography, I usually choose the focus range of 10–500 meters. The advantage of using the AF limiter is that autofocus finds its target faster. I have programmed the top button on the front of the camera for the AF limiter. By holding the button and turning the rear dial, I can select between the three stored distance ranges. The 300mm lens also has a focus range limiter on the lens itself.
DUAL MEMORY CARD SLOTS
The OM-1 has dual memory card slots, and the camera saves in parallel to both cards. It’s reassuring to have a backup stored directly in the camera. The memory card should be of the UHS-II type with a write speed of 300 MB/s to handle the camera’s high shooting rate.
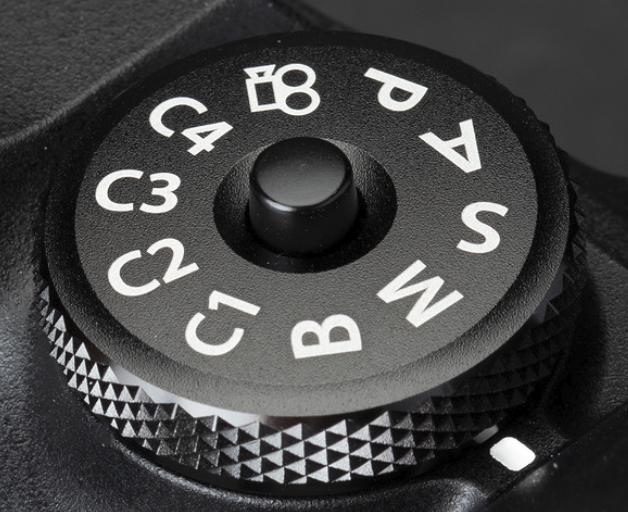
CUSTOM MODES
The camera settings for bird photography are stored in memory slot C1, accessible via the mode dial on top of the camera body. The OM-1 has four storage slots for presets — C1, C2, C3, and C4. One difference from the E-M1X is that the OM-1 saves changes on the fly to C1. This makes shooting more seamless, as you don’t have to manually save between turning the camera off and on. A noticeable and welcome improvement to the operating system.
GPS
OM System’s mobile app, OM Capture, records the GPS position for each photo, as well as the GPS track as a line. This works by connecting the phone to the camera via Bluetooth. The key is to remember to activate GPS tracking in the app when the trip starts and to stop and save the track when the boat is back at the dock. It’s extremely useful to have GPS coordinates for each photo in Lightroom and later be able to view the route on the map in the app. I often check GPS data to recall where I was on different trips, especially if some time passes before the photo blog is published. The old E-M1X camera has built-in GPS, in addition to recording temperature, altitude, and wind direction.

The Super Control Panel (SCP) on the rear screen will typically look like this.
Photography Techniques and Other Things to Keep in Mind on the Boat
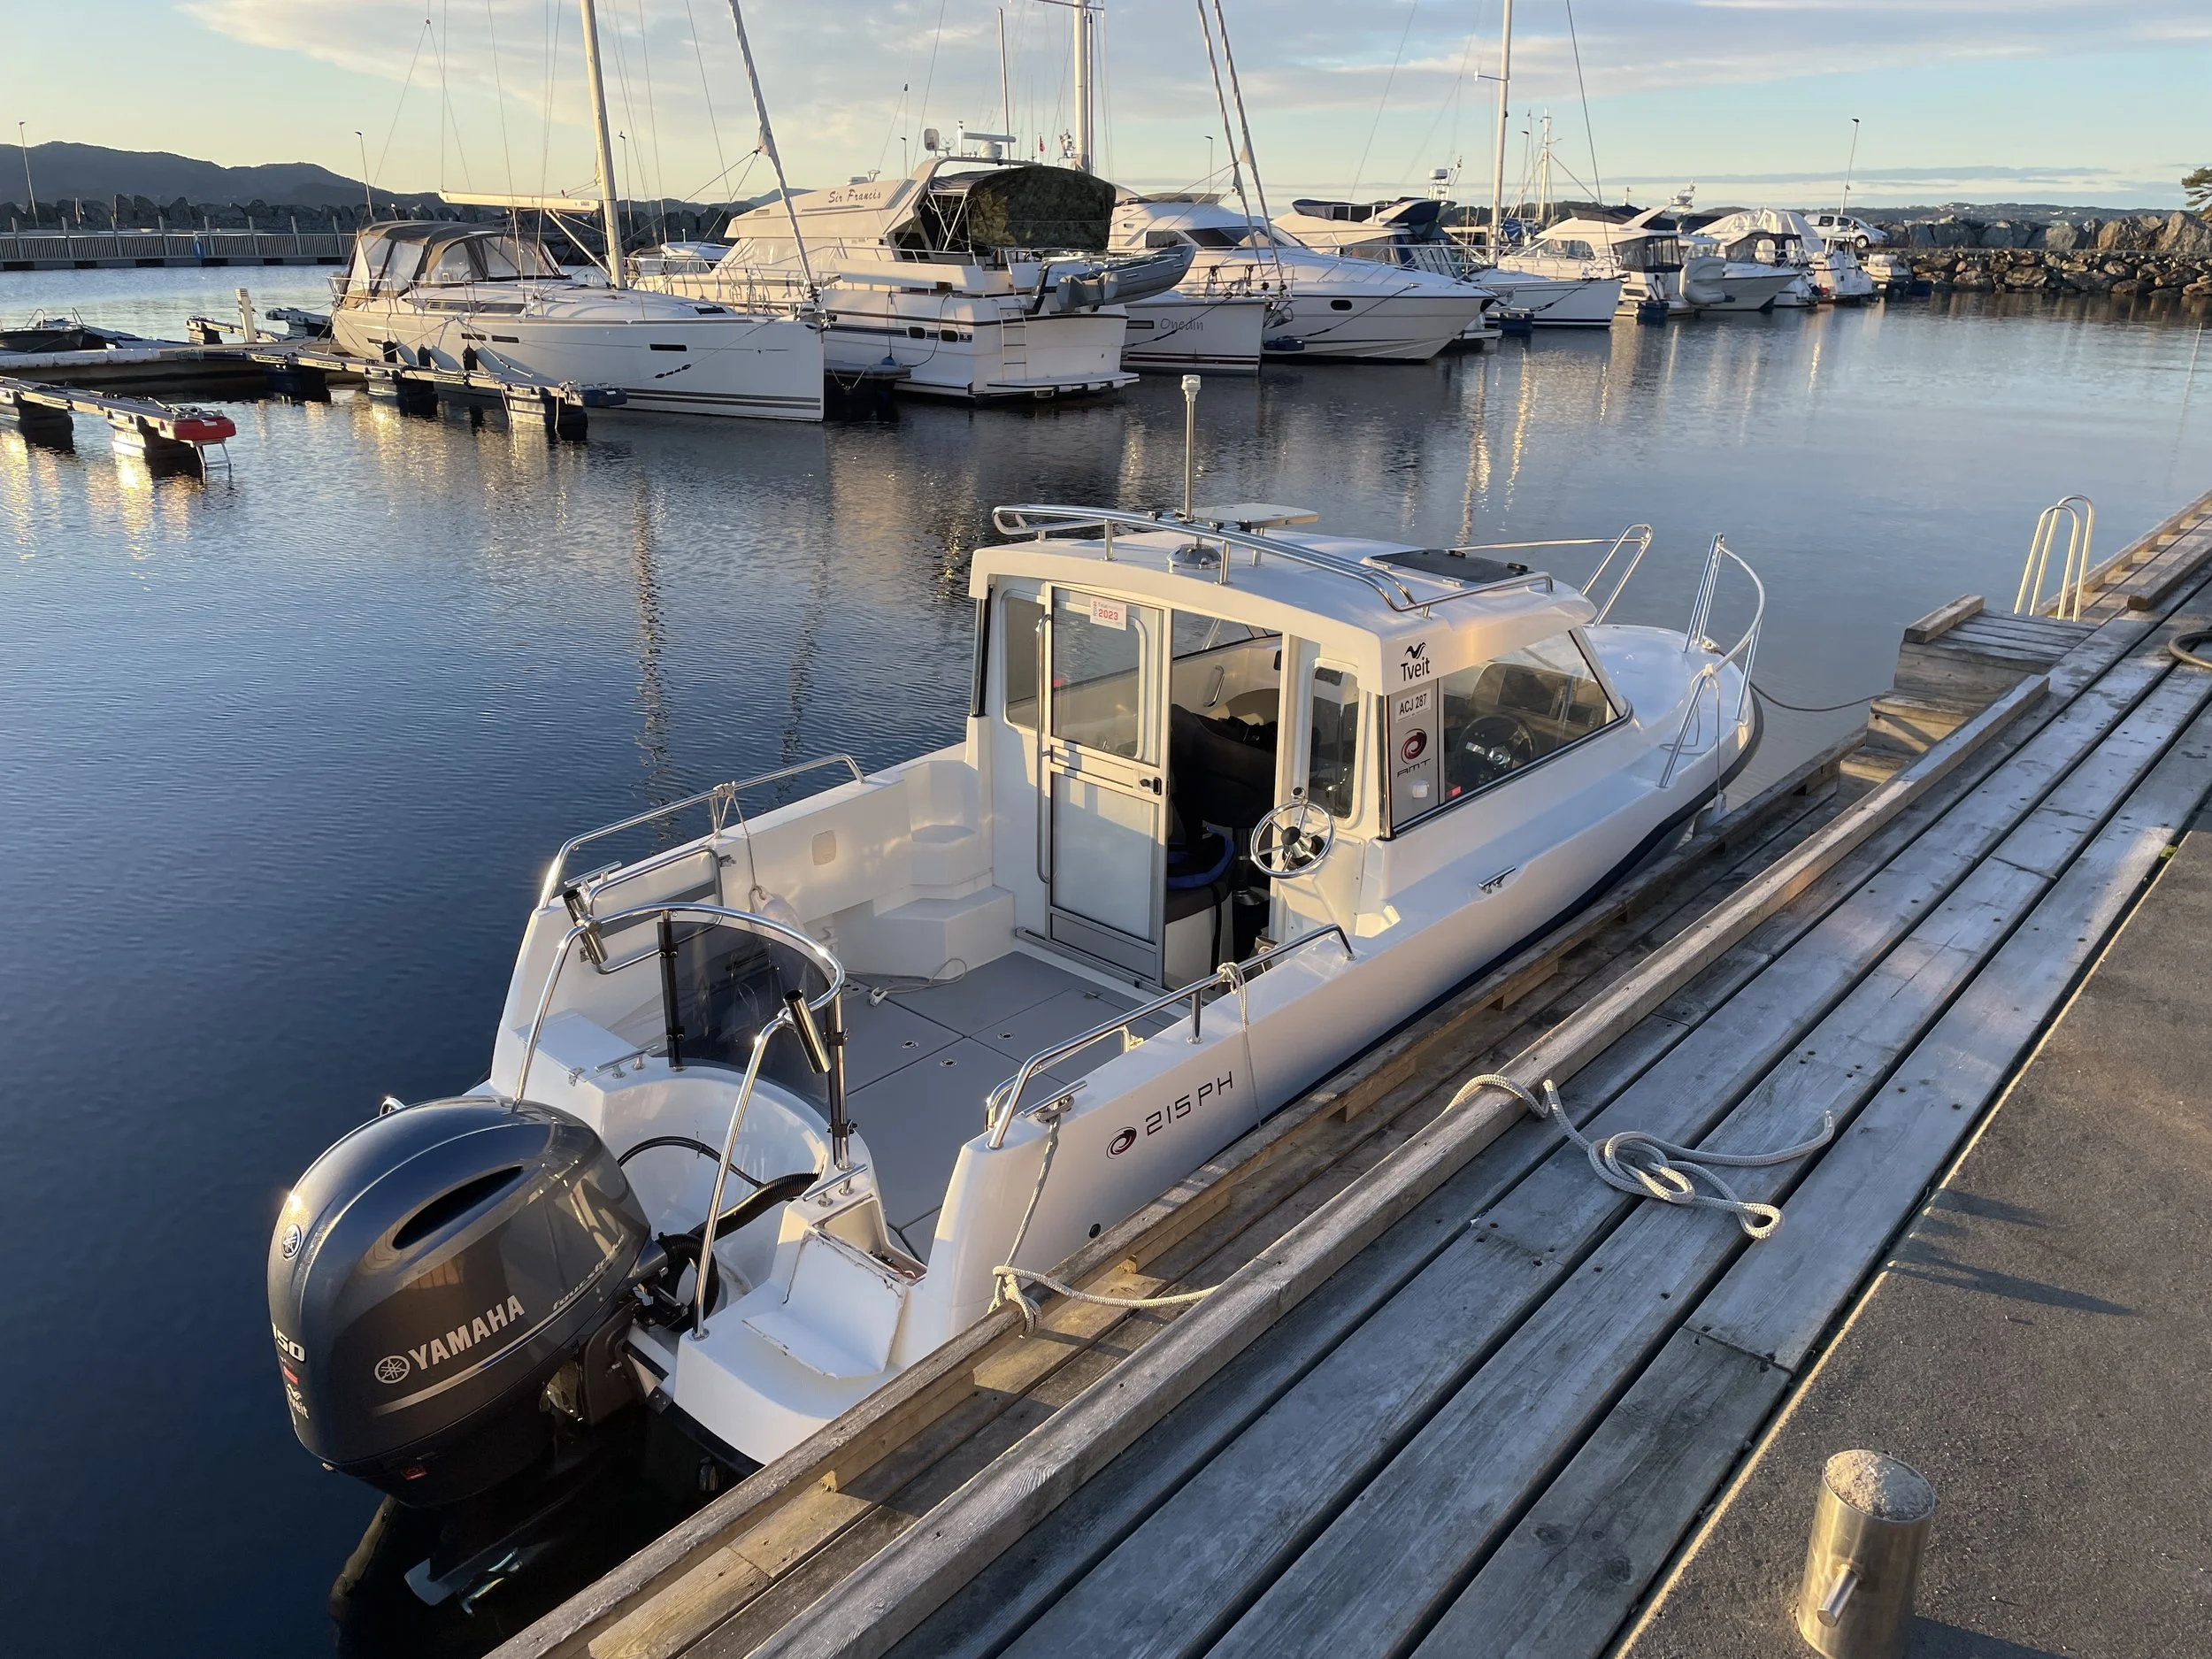
The AMT 215 PH is a very stable and seaworthy boat for the West Coast climate. It is in use all year round.
The boat is a 21-foot AMT 215 PH, and photography takes place on the aft deck. Shooting from a boat is not always easy. The boat can roll in the waves and from people moving from side to side. It can also be affected by current and wind, meaning I have to spend time and energy keeping it in the correct position relative to the sea eagle and the fish that was thrown. The boat has a pilothouse that the wind can easily catch and turn the boat sideways. Therefore, it’s important to keep the aft deck in an optimal position. Fortunately, the boat has an external steering system, which makes it easier to maintain control over positioning.
DOUBLE-CHECK CAMERA SETTINGS
A smart move is to double-check camera settings before each fish throw. There have been several times when I and other photographers have missed shots due to incorrect settings, such as shutter speed, frame rate, or focus mode. Changed camera settings can happen because another stationary subject appeared. It’s frustrating to discover afterward that the camera was set to single-shot instead of 25 fps, or S-AF instead of C-AF.
LOW PERSPECTIVE
When the sea eagle comes to grab the fish, it’s important to brace yourself — and ideally kneel down to get as low a perspective as possible. Getting half a meter to a meter closer to the water surface can elevate an image significantly. With several photographers in the boat, you also need to be careful not to get in each other’s way.
When the Sea Eagle Approaches
I have divided the actual photo sequence — from when the fish hits the water until the sea eagle has picked it up and carried it to land — into three phases.
PHASE 1 - THE GLIDING FLIGHT
When the fish has been thrown and the sea eagle is on its way, the key is to find it in the viewfinder. Then I activate autofocus using the dedicated AF-ON button for back-button focusing. The OM-1 has a dedicated autofocus button that separates focusing from the shutter release. It’s important to disable focus on the shutter button. On the OM-1, this is done in the AF menu, page 1 – AF with half-press/No.
In the viewfinder, check whether bird detection has marked the eagle with a white frame. The sea eagle will glide in at a calm pace until it decides to dive for the fish. During this phase, I can take a few shots, but I need to be careful not to fill the camera’s buffer too much when shooting at 25 fps.
The sea eagle Tor in gliding flight before he breaks into a dive.
PHASE 2 - THE DIVE
From the gliding phase, the sea eagle will suddenly bank to one side and dive at full speed toward the fish in the water. In this phase, it’s easy to lose sight of the eagle in the viewfinder. That’s why it takes practice to follow it throughout the entire flight. With a 300mm lens, this is not always easy — especially when the eagle is very close. Practicing on other birds on land can help improve technique. After many such situations, I’m fairly confident about what will happen, but misses can still occur. In this phase, it’s all about pressing down at 25 fps, but pausing briefly after a short burst to avoid filling the buffer too early.
The sea eagle Gyda banks and goes full throttle into the dive, here in February 2024.
The critical moment is usually just before, during, and right after the sea eagle has taken the fish. See the photo series below with the sea eagle Odd in action this January. There is a slight reduction in speed just when when the eagle grips the fish with its talons. At that point, it becomes especially difficult to keep the eagle roughly centered in the viewfinder and for the continuous focus to maintain its lock on the eagle. It is precisely in this phase that the camera’s autofocus has occasionally slipped. With some adjusted settings for how firmly the autofocus locks onto the subject, this has improved.
Odd just before…
…during…
…and after catching the fish. Nice and sharp this time.
PHASE 3 - THE ASCENT
When the sea eagle takes off, the speed and direction of its ascent can vary, so you need to maintain your concentration. This phase can also yield many great photos. Among other things, the sea eagle will often bend its head down to check the fish and possibly adjust its grip. Sometimes only one talon has caught the fish, and in that case, the sea eagle will usually secure the other talon during the upward climb.
The sea eagle Otto checks the catch and adjusts it with his left claw.
The sea eagle Gyda is climbing almost straight up here, and I can barely keep her within the upper part of the viewfinder. When you get to know individual sea eagles, you learn, for example, that this is Gyda’s distinctive trait.
The gull can act as a photo-bomber in both phase 1 and…
…in phase 3.
Help From the Gull
It may happen that the sea eagle doesn’t come right away. Then a gull might try to go for the fish, which can make for amusing photos when it tries to swallow an entire fish. When the gull lands on the fish, it almost always triggers the sea eagle to react from the shore. In that sense, the gull is the photographer’s best friend when the sea eagle hesitates to come for some reason.
The herring gull is trying to swallow the fish, which in this case was a bit too big.
If the fish is a bit too small, both the herring gull and especially the great black-backed gull can swallow the whole fish and fly off with it. Then it’s quite heavily loaded, and we’ve seen several gulls that can barely take off with their bellies stuffed and heavy with fish. Again, this will almost certainly trigger the sea eagle on land. Then the eagle goes full throttle and will often manage to force the gull to regurgitate the fish. You can read about that here, where I managed for the first time to photograph the fish on its way back to the sea after the gull spat it out.
The sea eagle goes full throttle to force the fish out of the gull on the right. In this case, it succeeded.
The gull has noticed what’s coming up behind it.
Optimizing Sea Eagle Photography
A sea eagle trip usually starts by finding a good fishing spot and taking the time needed to catch enough saithe and pollock to allow for as many eagle encounters as possible. This can easily take an hour of fishing, or even several hours. Patience is key. Sometimes I bring completely frozen fish left over from the previous trip, which makes it possible to start photographing more quickly.
When the fish box is full enough, the photo gear is ready, and the sea eagles are at home, there are still several things to consider to optimize sea eagle photography, summarized in the following main points:
WIND DIRECTION
As a rule, the sea eagle will land against the wind. Therefore, the fish should be thrown with the wind, with the bow facing into the wind, to get the bird as much as possible from the front. If it’s calm, it’s more of a gamble which direction the eagle will approach from. No matter which side the eagle shows to the boat and camera, the photos can be interesting. Even a sea eagle photographed from behind can make a good shot.
DISTANCE
Keep a suitable distance between the boat and the fish, adjusted to the lens being used. Things can drift if the sea eagle doesn’t react immediately. If some time passes, the current may have carried the fish to a completely different spot than we’ve managed to track. Several times we’ve thought the fish was lost, only for the sea eagle to suddenly take off and retrieve it farther out in the fjord.
UNSUITABLE FISH
Avoid catching mackerel! It has no swim bladder and sinks immediately. The alternative is frozen mackerel, but that option has mixed success. A more successful alternative is to throw the mackerel onto land — we’ve had good results with that several times.
BACKGROUND
Avoid throwing the fish where there’s a risk of distracting elements in the background, such as houses on land, other boats, bridges, etc. A bridge can work well as a background for an eagle, but it also quickly reveals where you’ve been, which isn’t always desirable.
BOAT WAVES
Keep an eye on other boats nearby and wait until any waves from larger boats have passed.
Variation in Subject and Light
Sea eagle photography is about more than just the eagle coming to grab a fish. It can include interactions with other birds like gulls and crows, landing sequences in treetops, feeding on land or in trees, cleaning its beak, missing the fish, eaglets begging for food and being fed outside the nest. In addition, it’s great to capture the sea eagle in its natural environment, whether on land or in the air. Zooming out a bit and including more of the surrounding landscape gives different perspectives and impressions.
What I’m missing in my photo archive is experimenting with long exposure times. Maybe next year will be the year for that?
Below, I’ve tried to illustrate different subjects and situations.
Sea Eagle in Backlight
Backlight creates beautiful contrasts of a young eagle in February 2025.
Otto in backlight, September 26, 2024.
Sea Eagle in Evening Light
Otto in evening light, May 2024.
Gyda on an August evening in 2024.
Other Situations
Ottar lands in the top of the pine tree, ready for the next fish throw.
Ottar fine-tunes his beak against the pine needles after a good fish meal in another pine tree. There, he sat on a thick branch and did a rough cleaning of his beak before flying up into a this pine.
Ottar enjoys a well-deserved meal on land.
Gudrun brings a mackerel to her chick in 2023. There’s a lot of screaming and squawking from the eaglets!
Photography During the Breeding Season and Other Times
The sea eagle chick was served its meal on land and tore out the innards before the rest of the mackerel went down its throat.
Sea eagles need peace and quiet as the breeding season approaches, usually in March–April. At that time, you should approach carefully and keep a good distance from the nest site. From experience, however, the eagles still show interest in the boat they’ve grown accustomed to over time as the one that brings a snack.
Their interest in the boat and the fish in the fish box is especially strong when the chicks have hatched and the need for food is high. If there are two chicks in the nest, as with Gyda and Tor in 2024 and 2025, the parents are twice as busy. Whether they’re twice as grateful for the boat is another story.
By August, the eaglets are out of the nest. At that point, the parents clearly start training the young in the art of getting food. Both parents may sit and wait for the youngster to fetch the fish from the sea. If it takes too long, one of the adults will often eventually serve the fish to the chick sitting on land. With the eaglets out of the nest, there’s always plenty of begging for food with lots of screaming and squawking — and many great moments to capture with the camera.
An unwritten rule is not to publish photos of nests with chicks, or nests at all. Doing so can attract unwelcome two-legged visitors who want to steal eggs. No nature photographer wants to contribute to that.
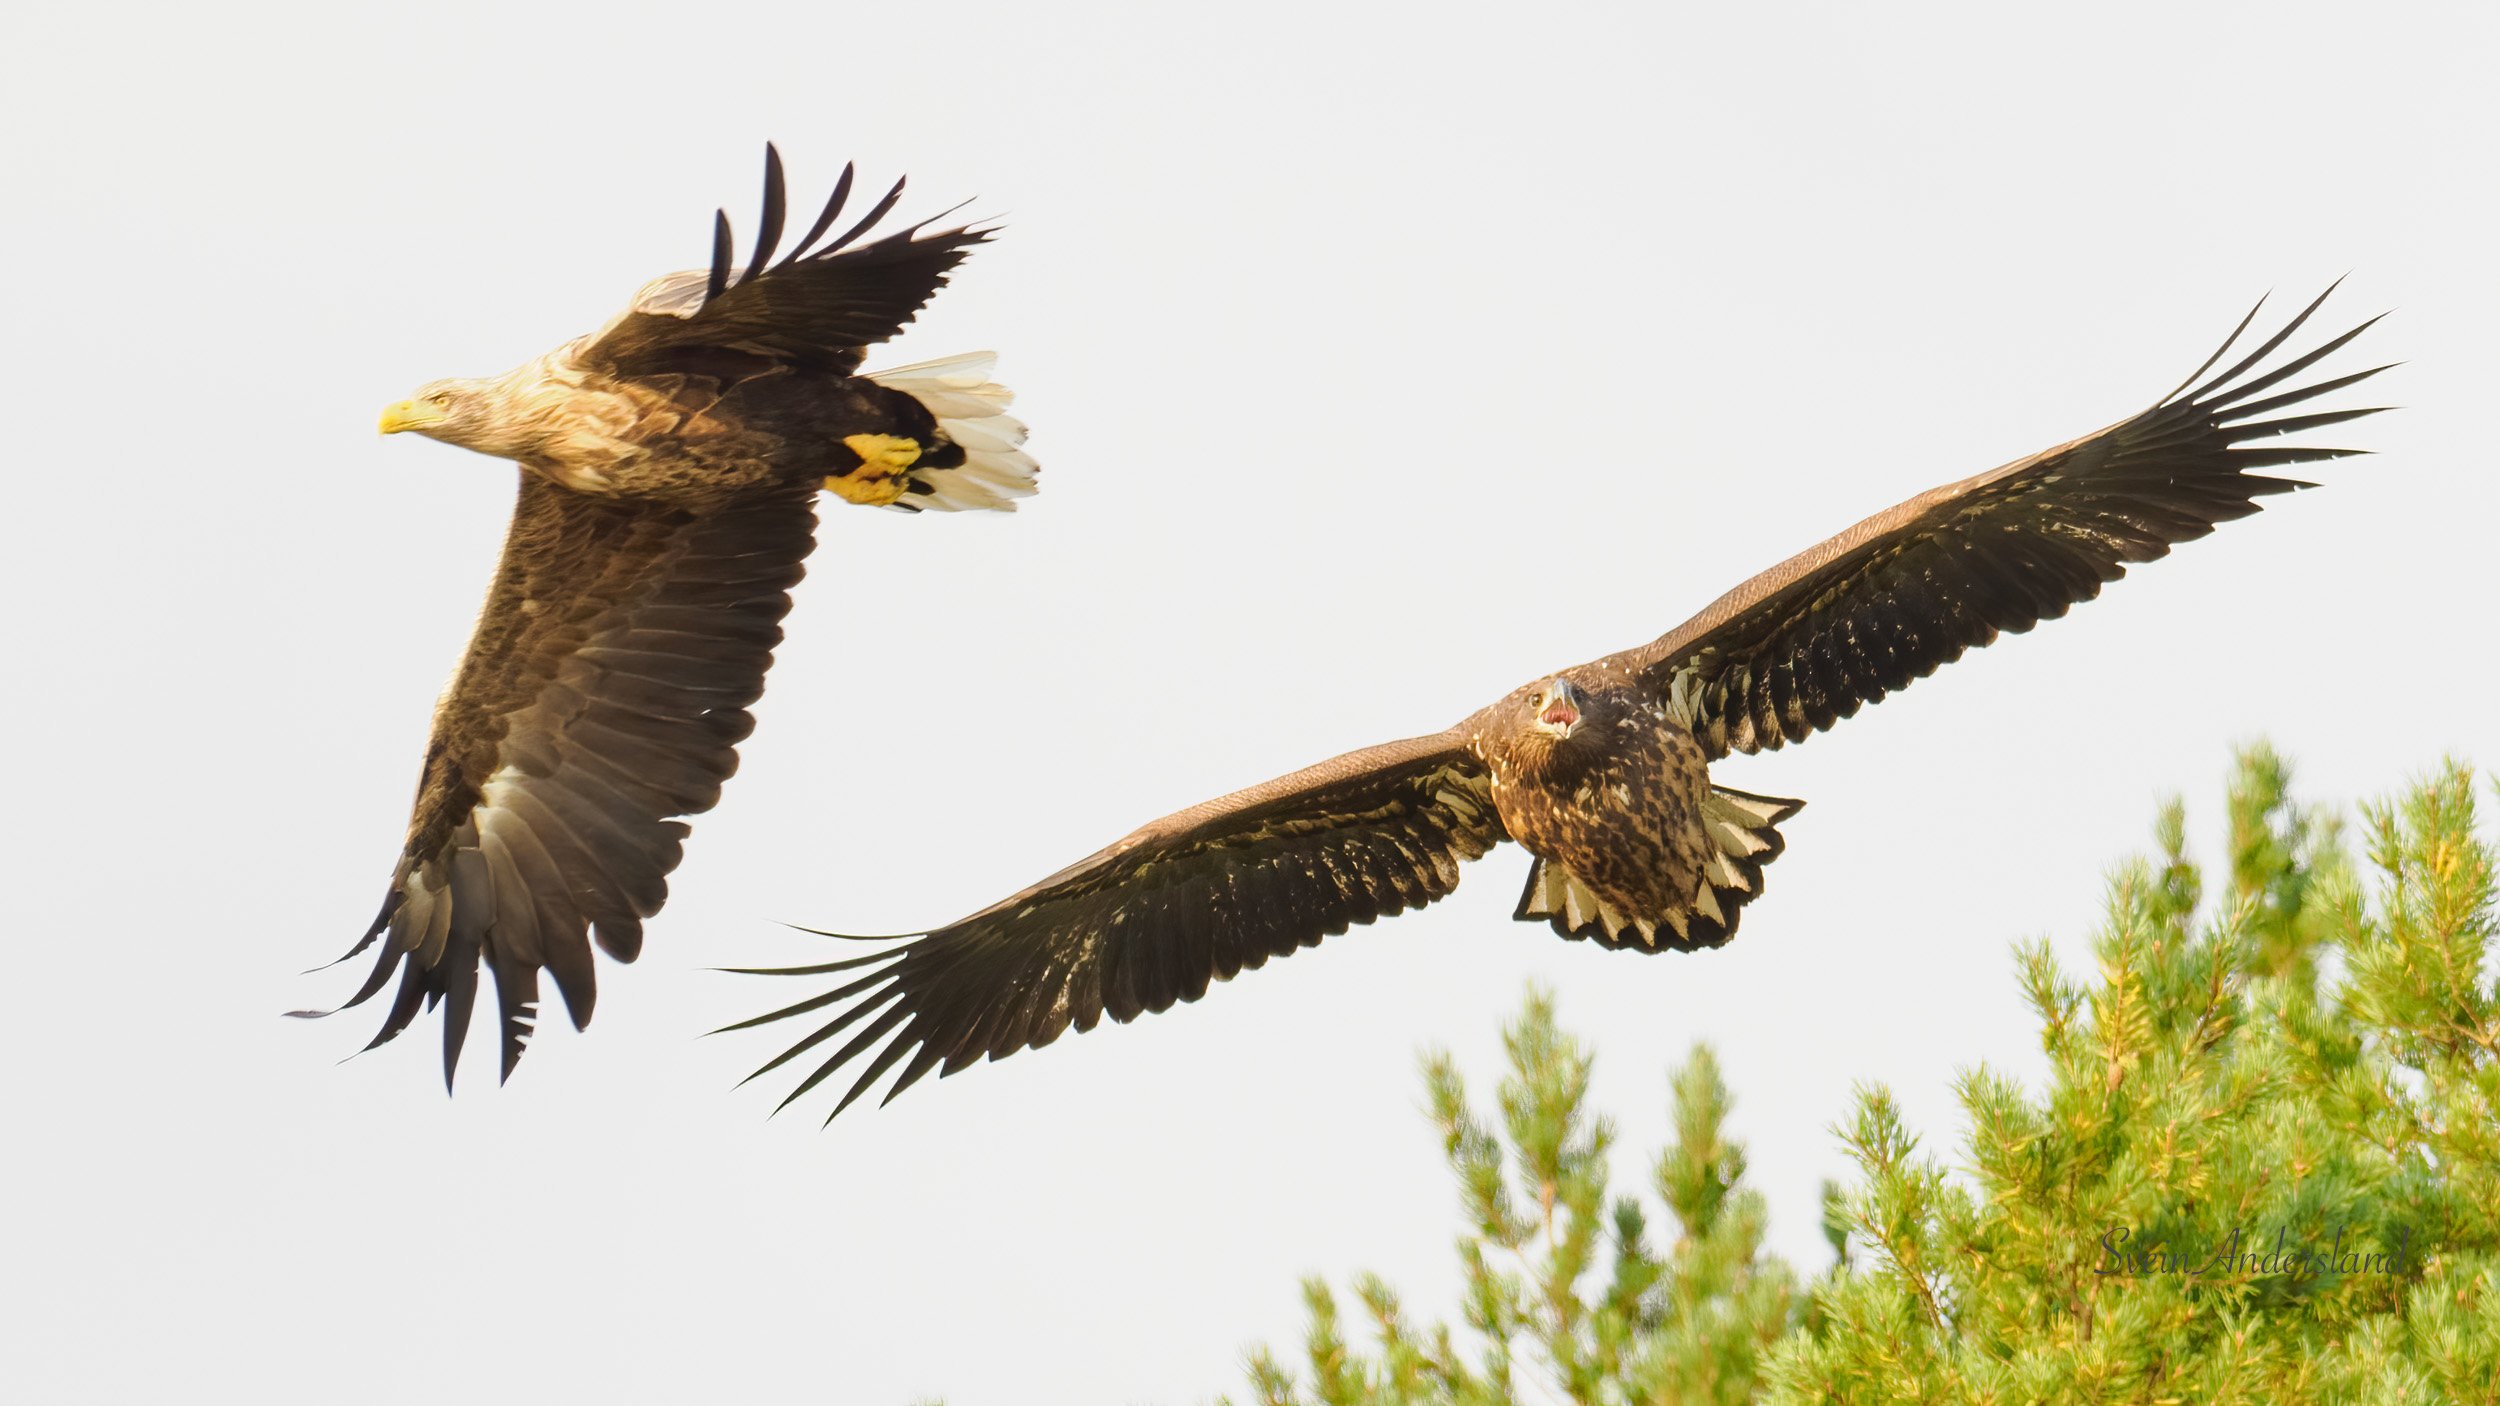
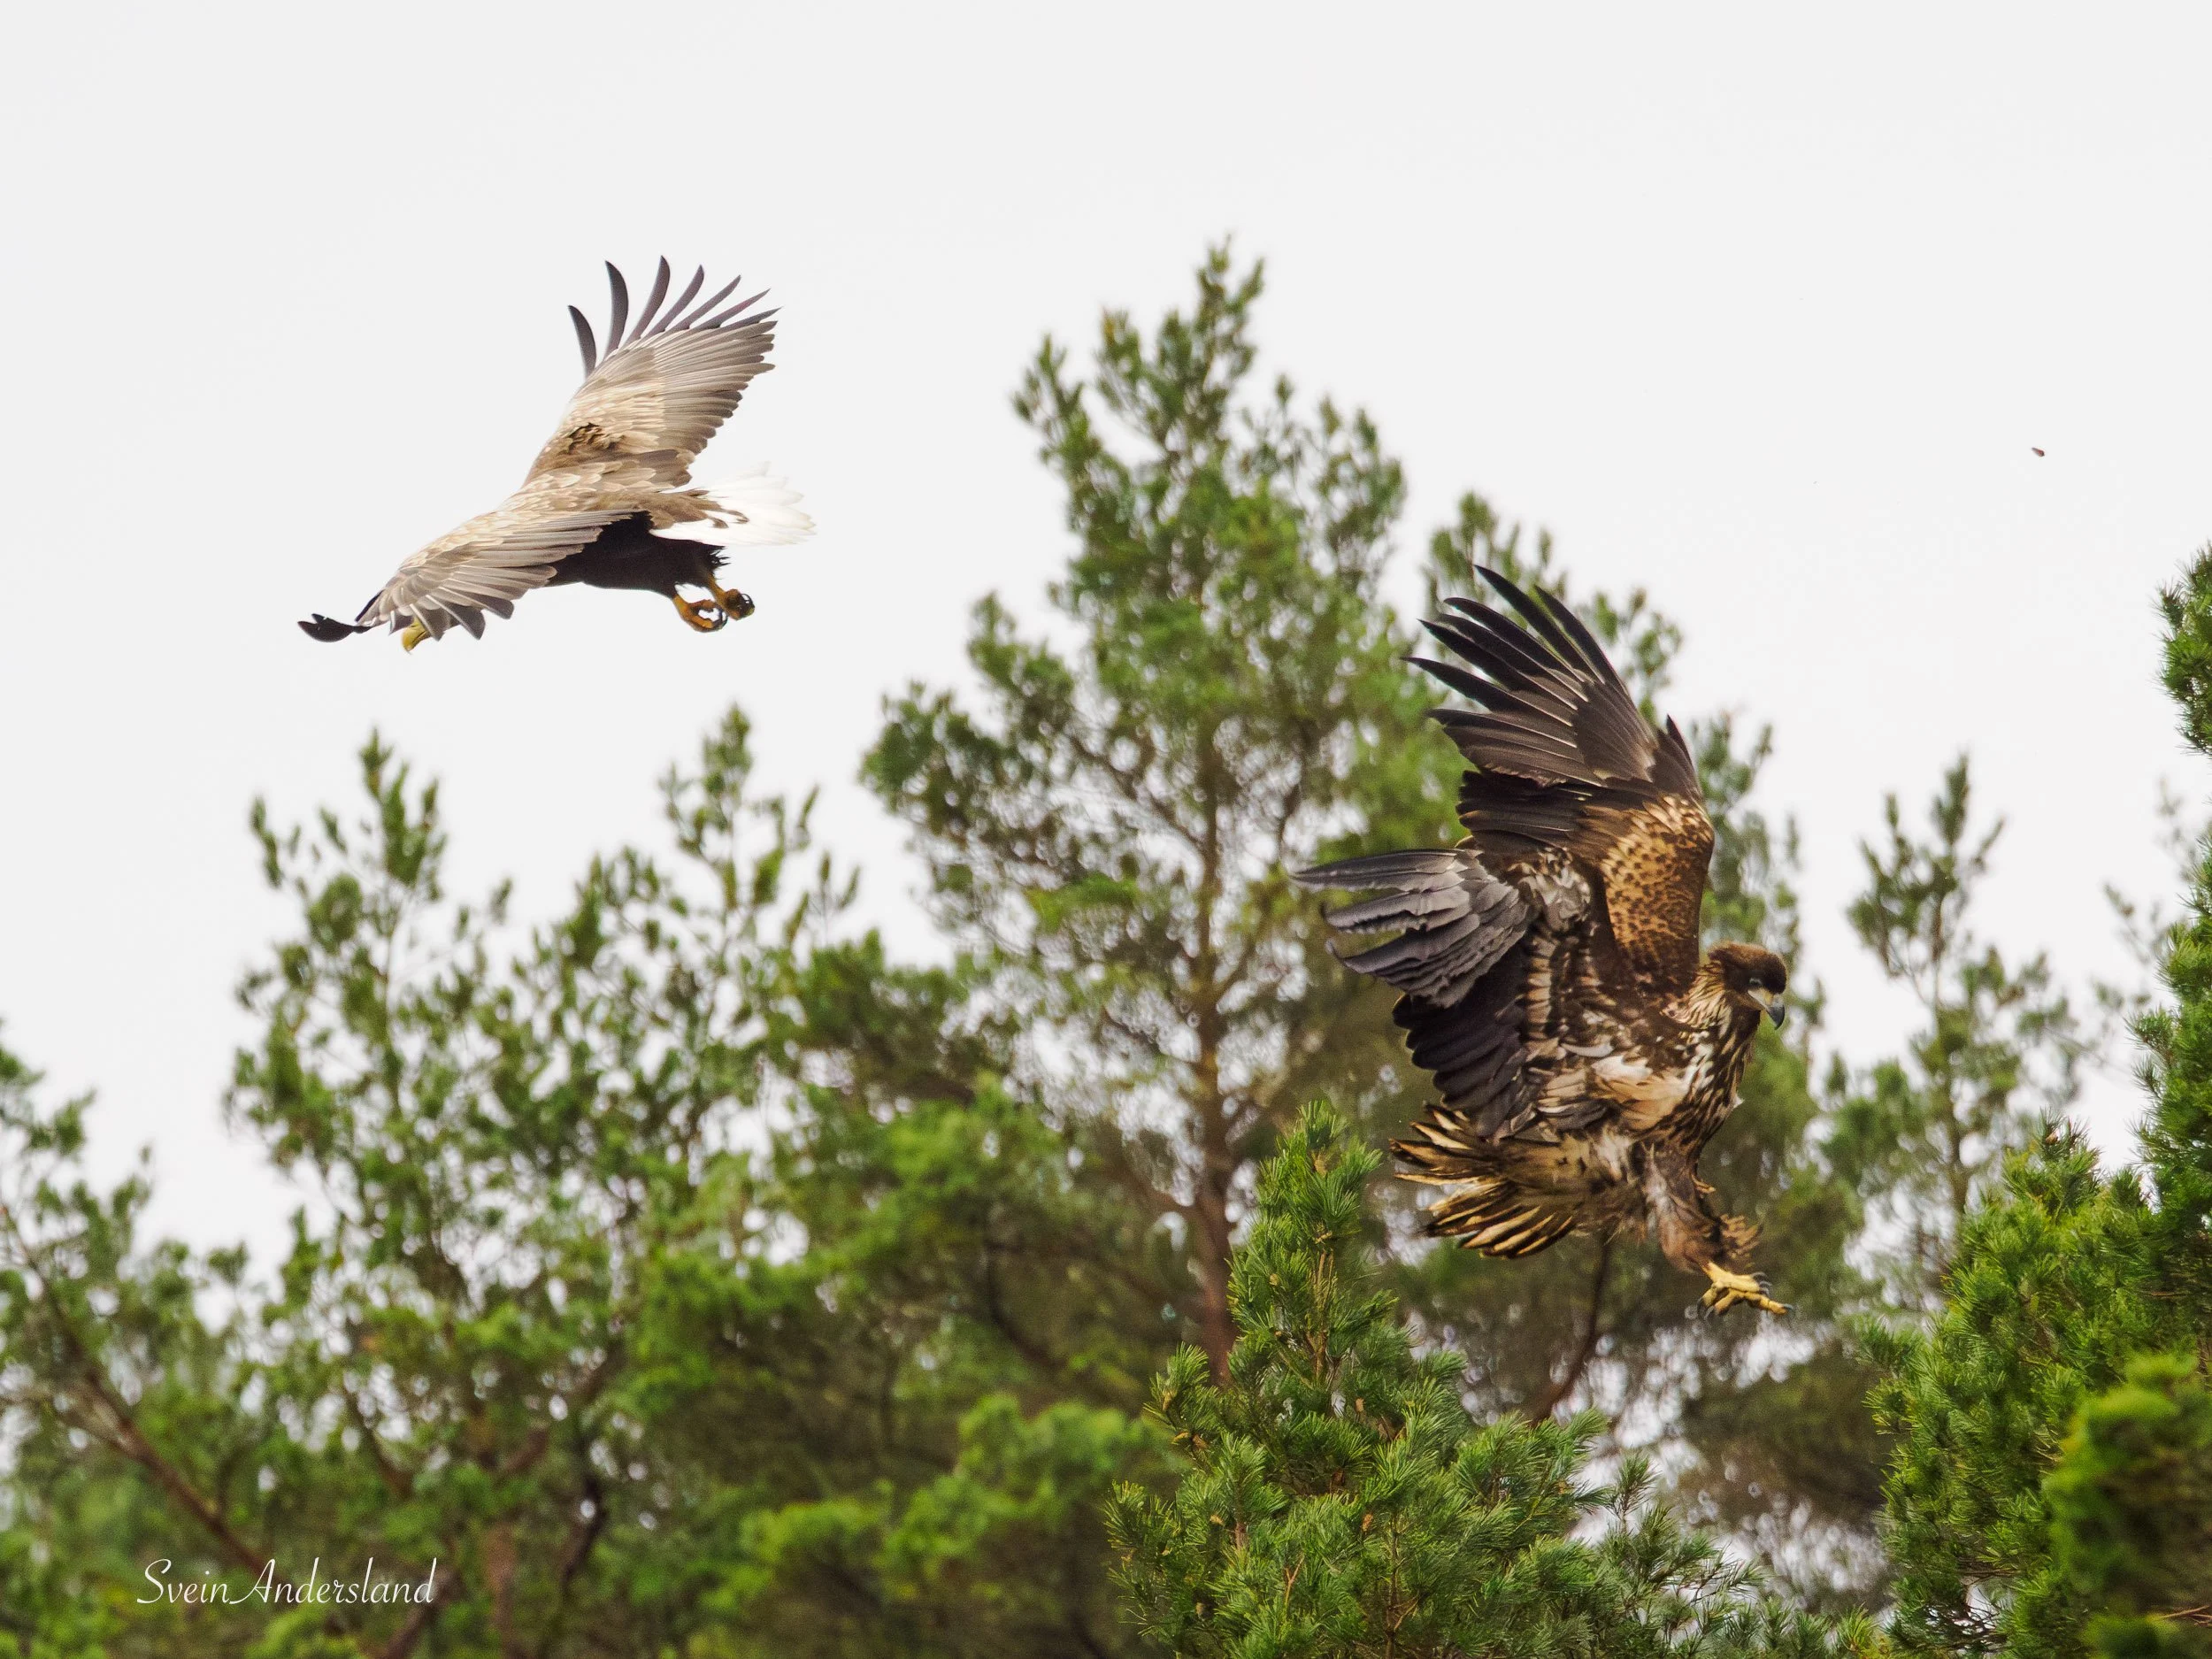
There’s real action in the sea eagle camp when the youngsters take to the air! Here, Tor is trying to escape a screaming juvenile in hot pursuit. The moment happens in the blink of an eye — but luckily, the OM-1’s lightning-fast autofocus nails it. Capturing these split-second dramas is what makes wildlife photography so thrilling.
Photo Series
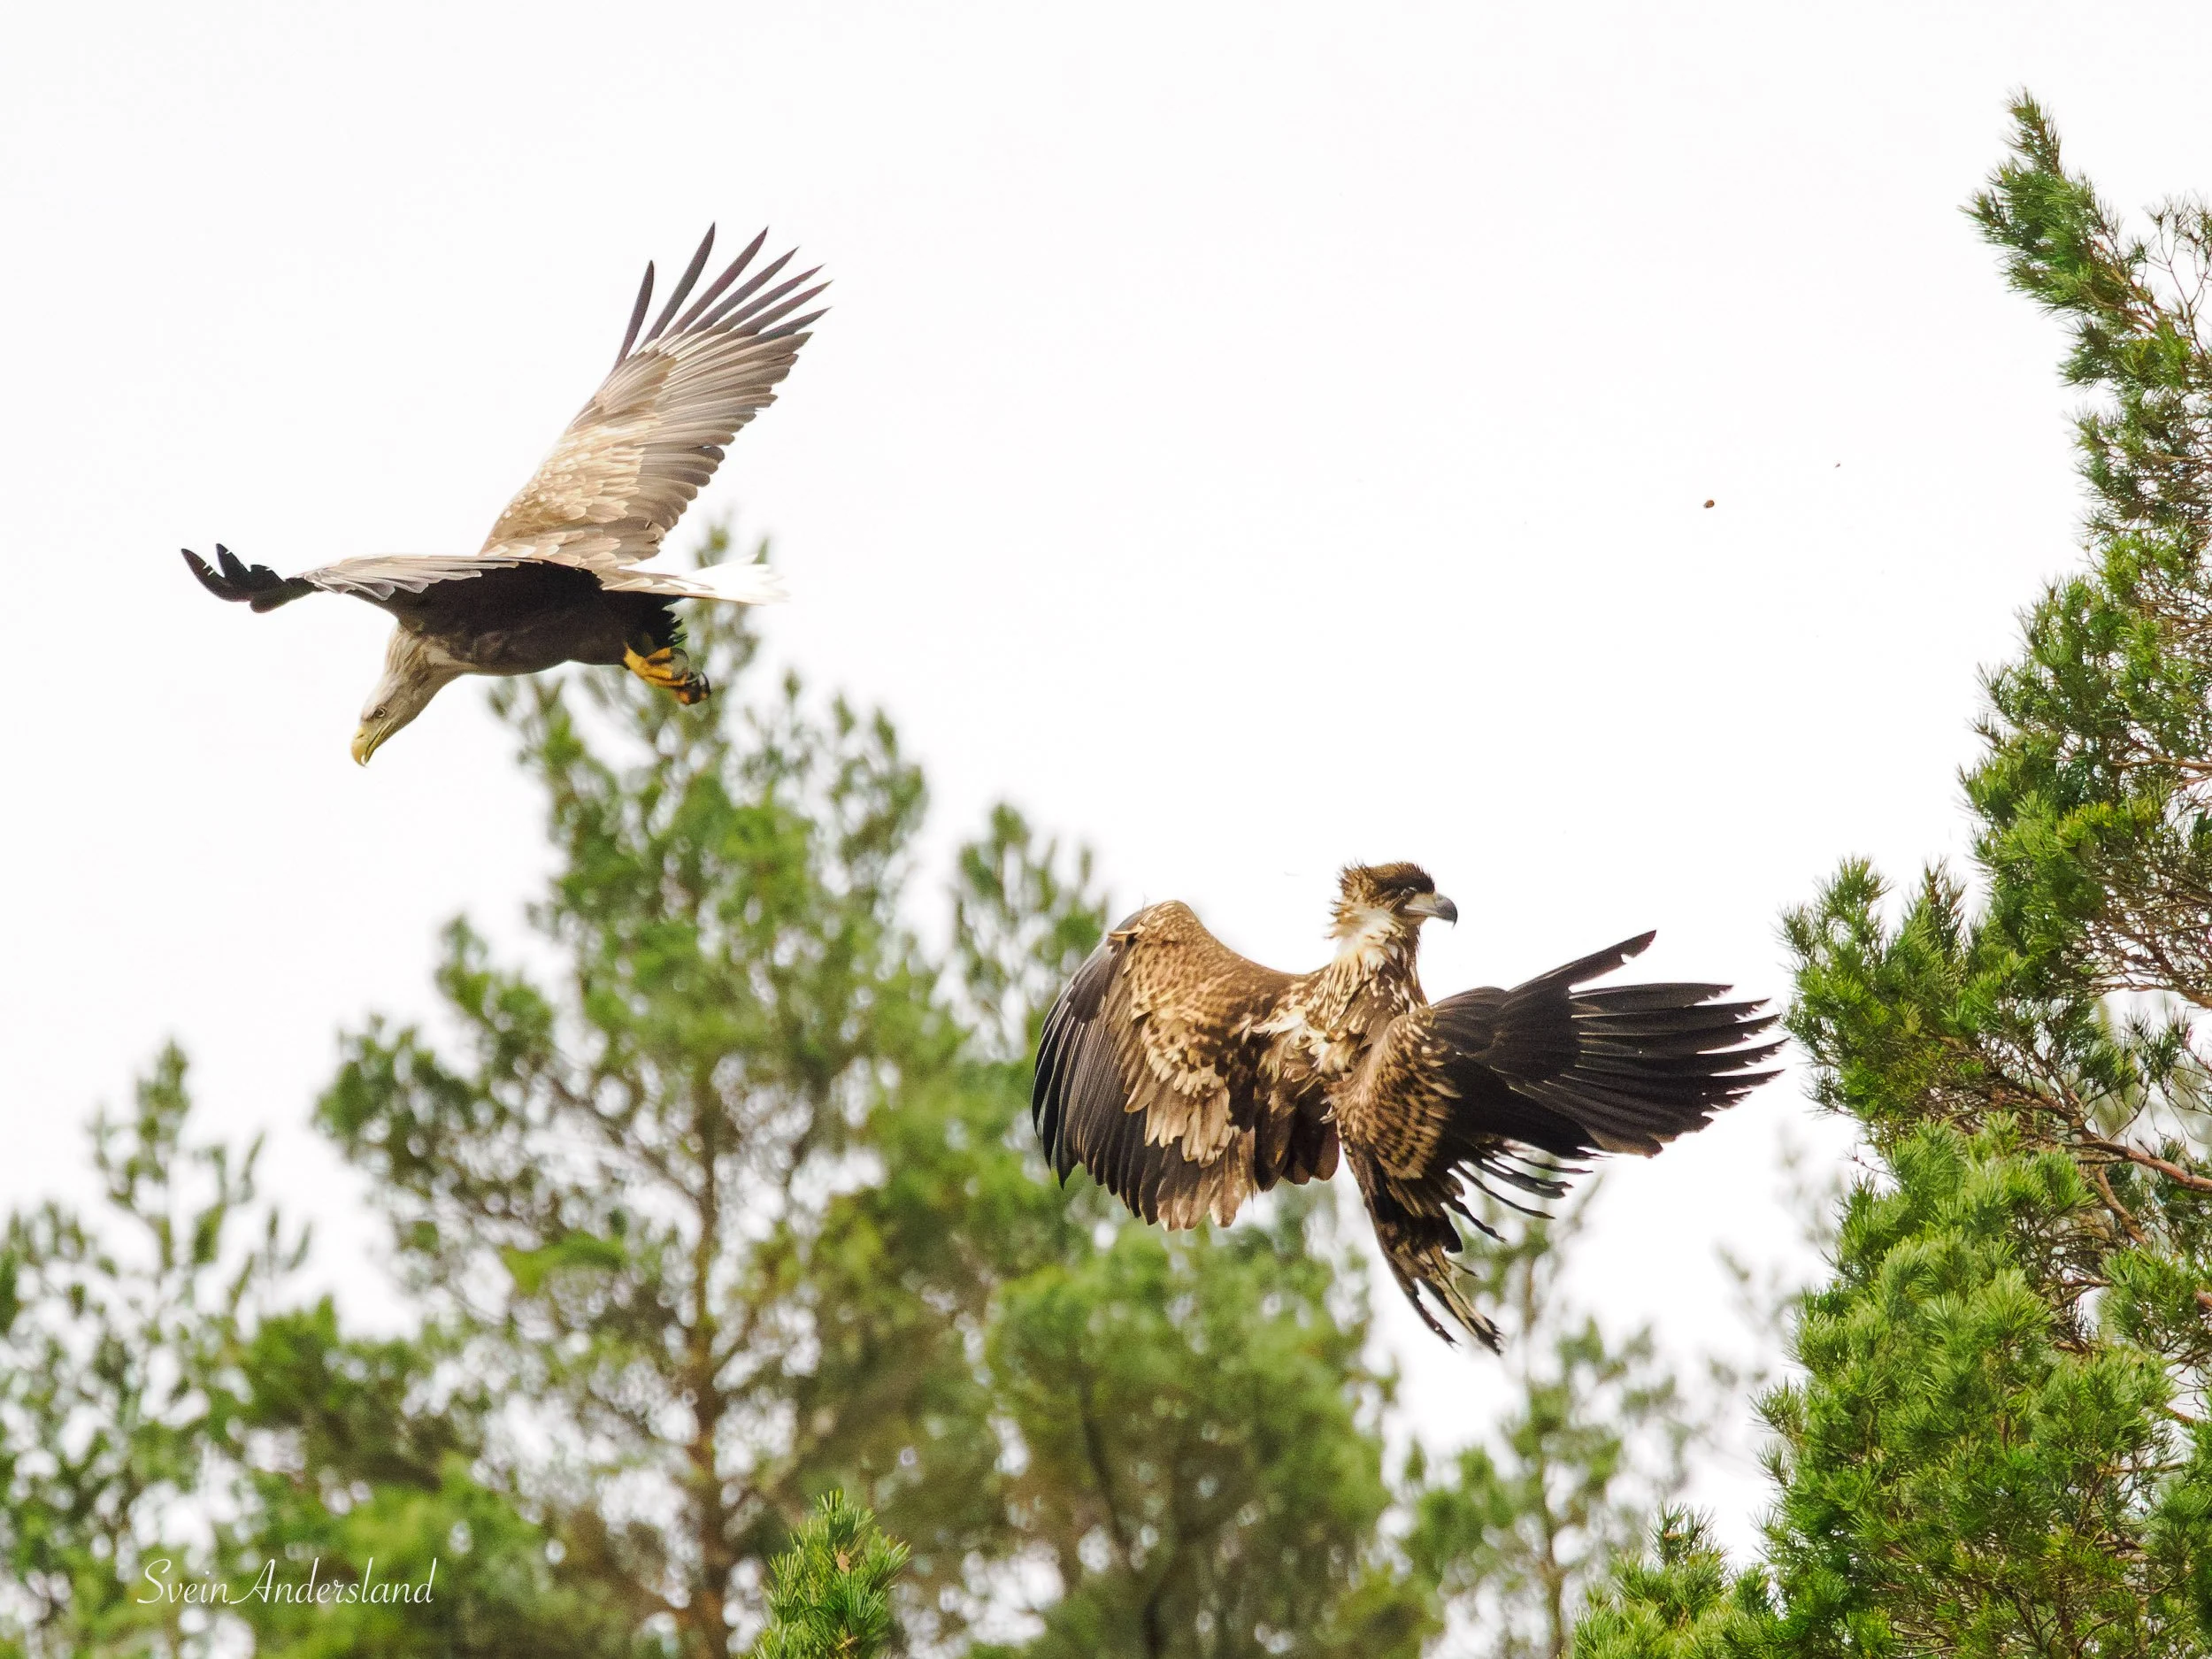
Using a photo series to tell a story can be incredibly powerful. Personally, I tend to share several shots from the same sequence—not just because it’s hard to choose, but because it reveals more of the drama in a single event. Below is an example from February 2025, when Ottar chased a young eagle out of the pine treetop where it was resting. The entire scene unfolded in seconds, and capturing it felt like freezing a wild, untamed moment in time.
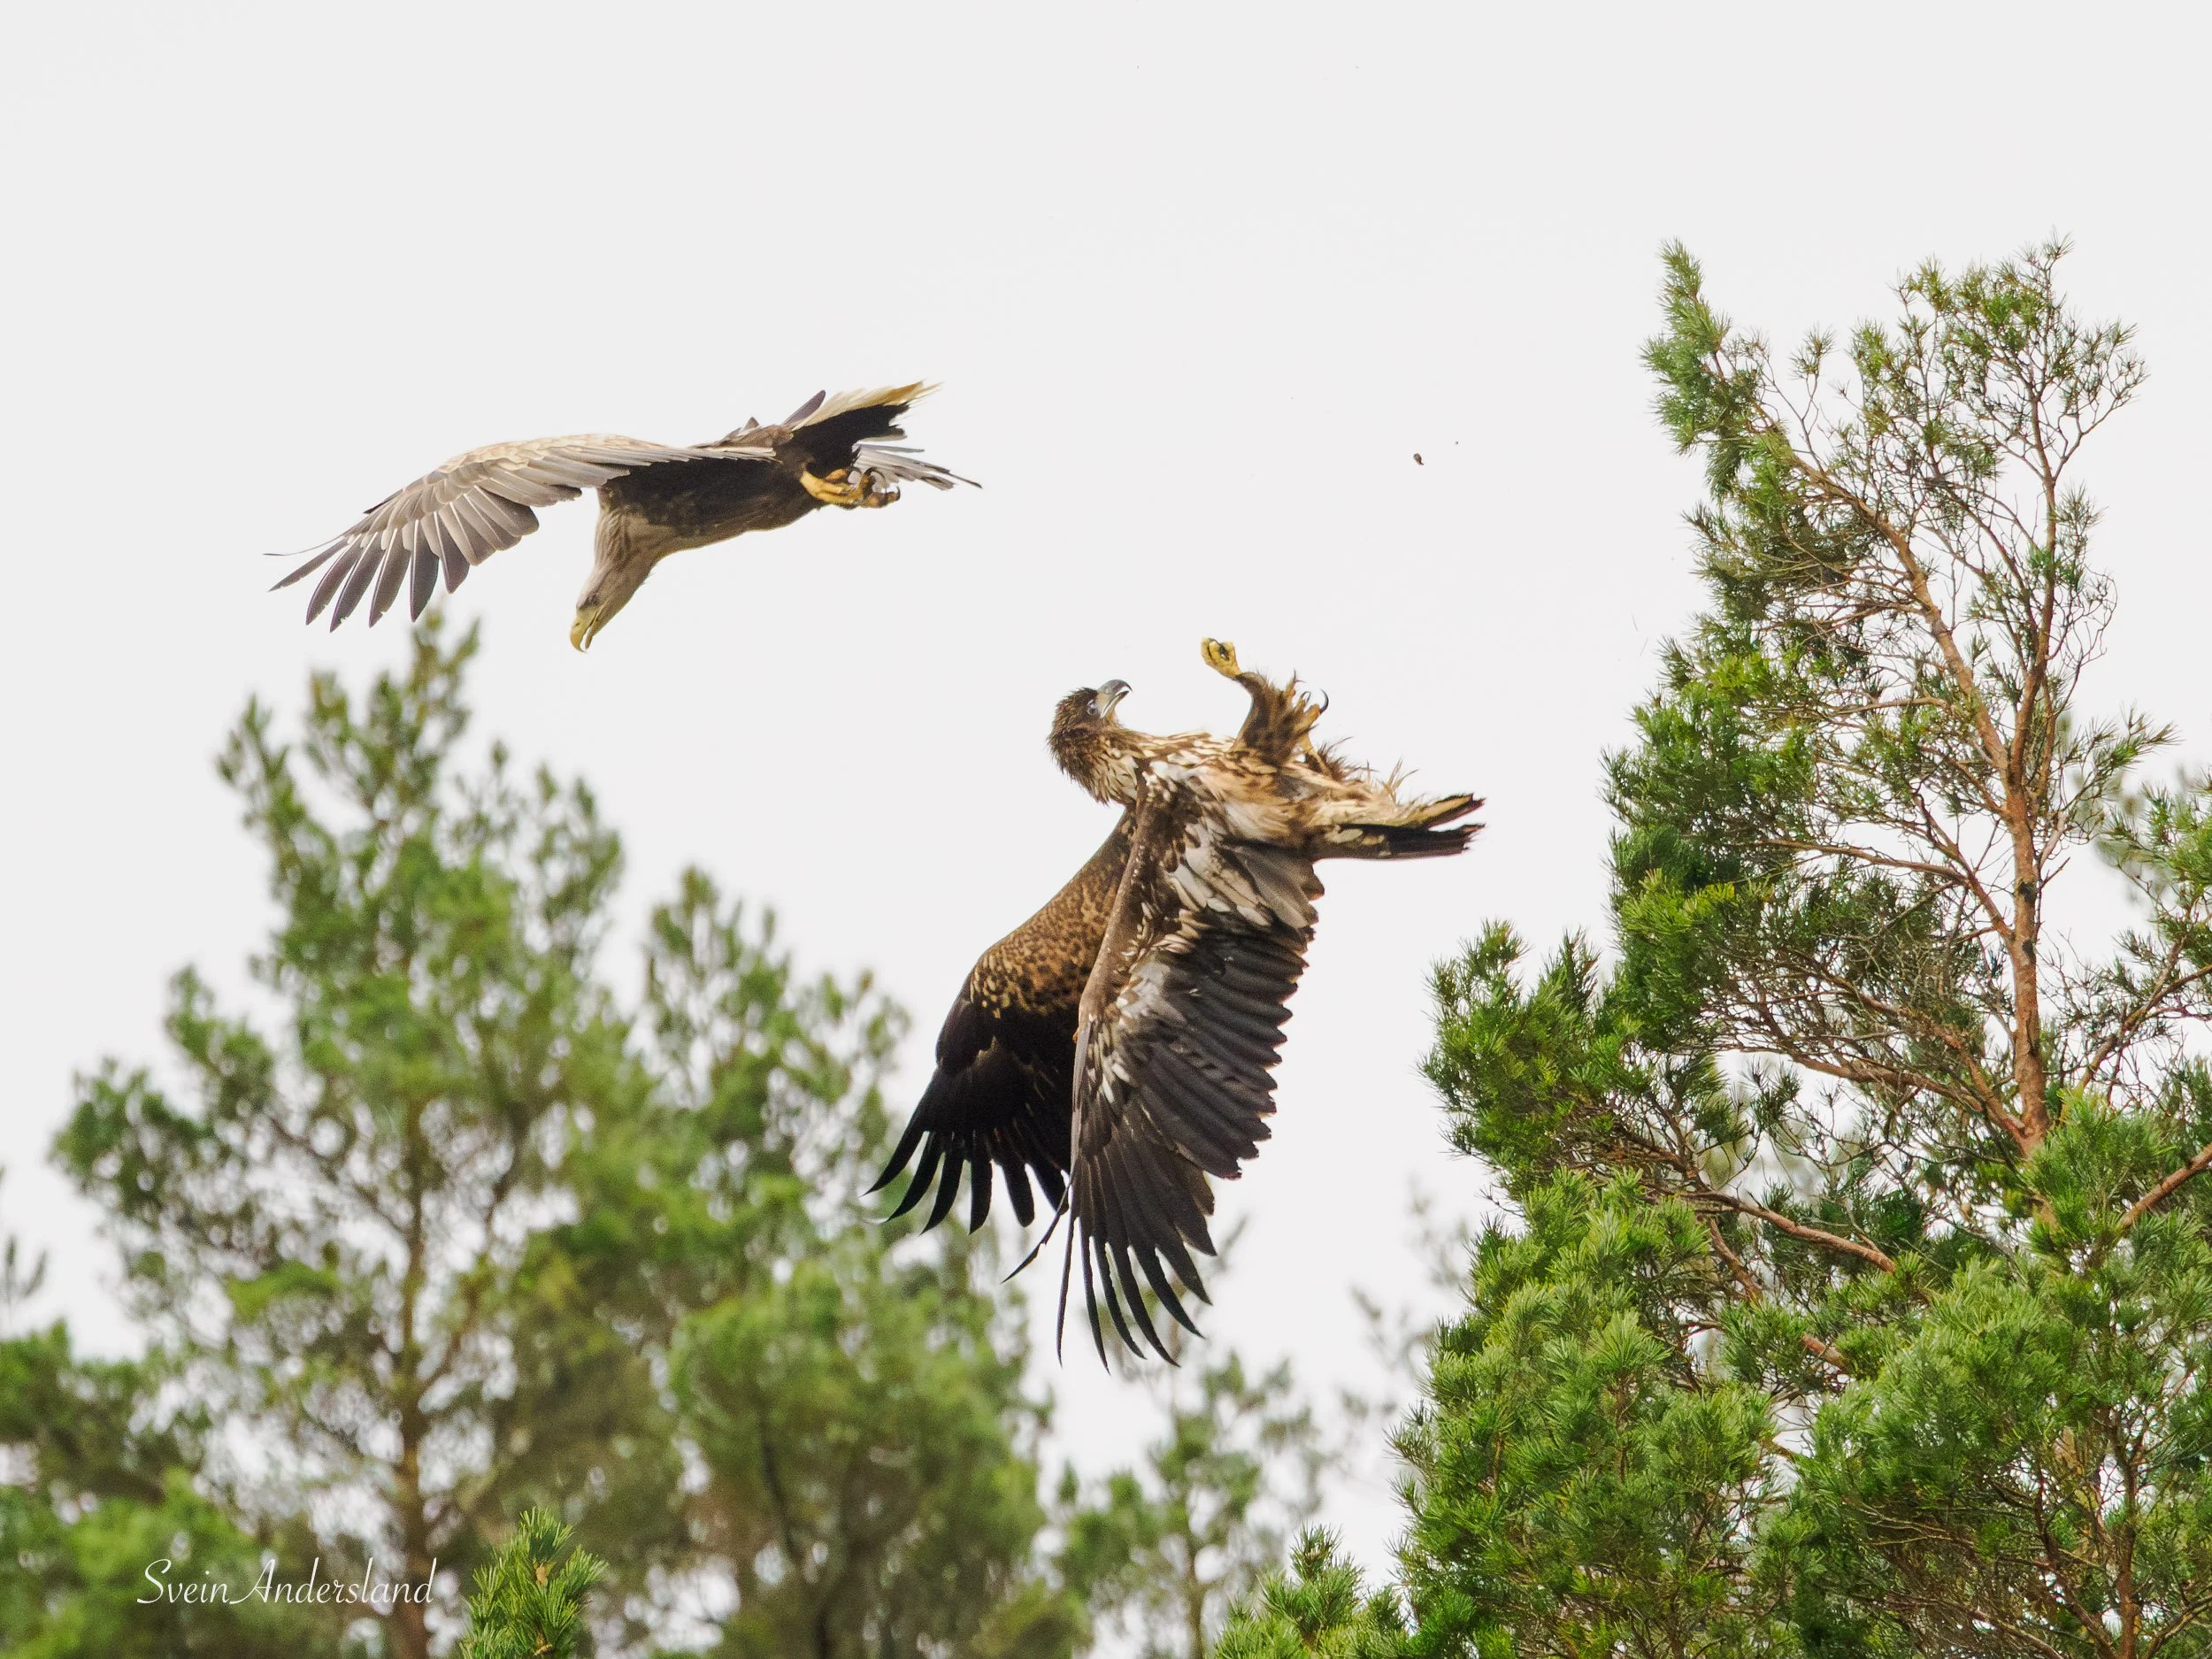
Ottar pusing the juvenile down from it`s tree
The classic photo series is, of course, the sea eagle swooping in to snatch a fish — like the sequence below. Here, Otto comes straight toward the boat in beautiful evening light. The middle shot is pure drama, almost like a resurrection scene! This series was captured on Whit Monday in May 2024 and remains one of my favorites for its intensity and timing.
Otto just before…
…during…
…and after catching the fish.
Subjects That Stand Out
Sometimes new and unexpected situations and subjects appear — and that’s what spices up the photo archive, breaking the repetition of similar shots. That said, we almost always experience something new on every trip. The most exciting moments are discovering new sea eagle pairs and nest sites, but we also learn something new about eagle behavior almost every time.
‘Why isn’t the eagle reacting now?’ is a question often asked in the boat. Those mysteries keep us curious and make every outing unique.
The great black-backed gull doesn’t mind lying on its back and disrupting the white-tailed eagle’s landing approach, seen here on May 1, 2022.
The great black-backed gull has plucked a feather from Otto’s shoulder.
Gyda misses the fish, September 5, 2024.
The herring gull grabs Gunda’s right wing.
Ottar pushes the young eagle off the top of the pine.
The white-tailed eagle chases the great black-backed gull that has escaped with a flatfish. The pursuit went far out across the fjord, but this time it didn’t succeed in forcing the gull to regurgitate the flatfish.
Environmental Photos
It’s also nice to place the white-tailed eagles within the landscape environment they live in. Here are some photo examples of that.
Tor makes an intermediate landing with the fish in a dead tree.
In Otto’s fjord realm.
The cone eagle!
Fishing Equipment

Perfect sea eagle food!
The sea eagle trips are all about fishing and photography. There isn’t much special to write about fishing and fishing gear, but it’s still an important part of sea eagle photography. Without fish, no sea eagle. At least most of the time. Below are some key points:
Garmin echo sounder permanently mounted in the boat helps locate fish.
A good fishing rod and reel. Perhaps more important than you think, since you can spend many hours with the rod during a day.
Fish box with lid. The lid helps prevent too much blood splatter in the boat. The fish gets a hard blow to the head with the gaff. Still, there can be blood, especially with mackerel in the box.
A good landing net to secure the fish into the boat and retrieve fish that the eagle doesn’t take. Every fish is precious on these trips, so this is an extra good insurance.
Bucket with water and cloth to wash and dry your hands after throwing out the fish, before grabbing the camera or lens again.
Closing Remarks
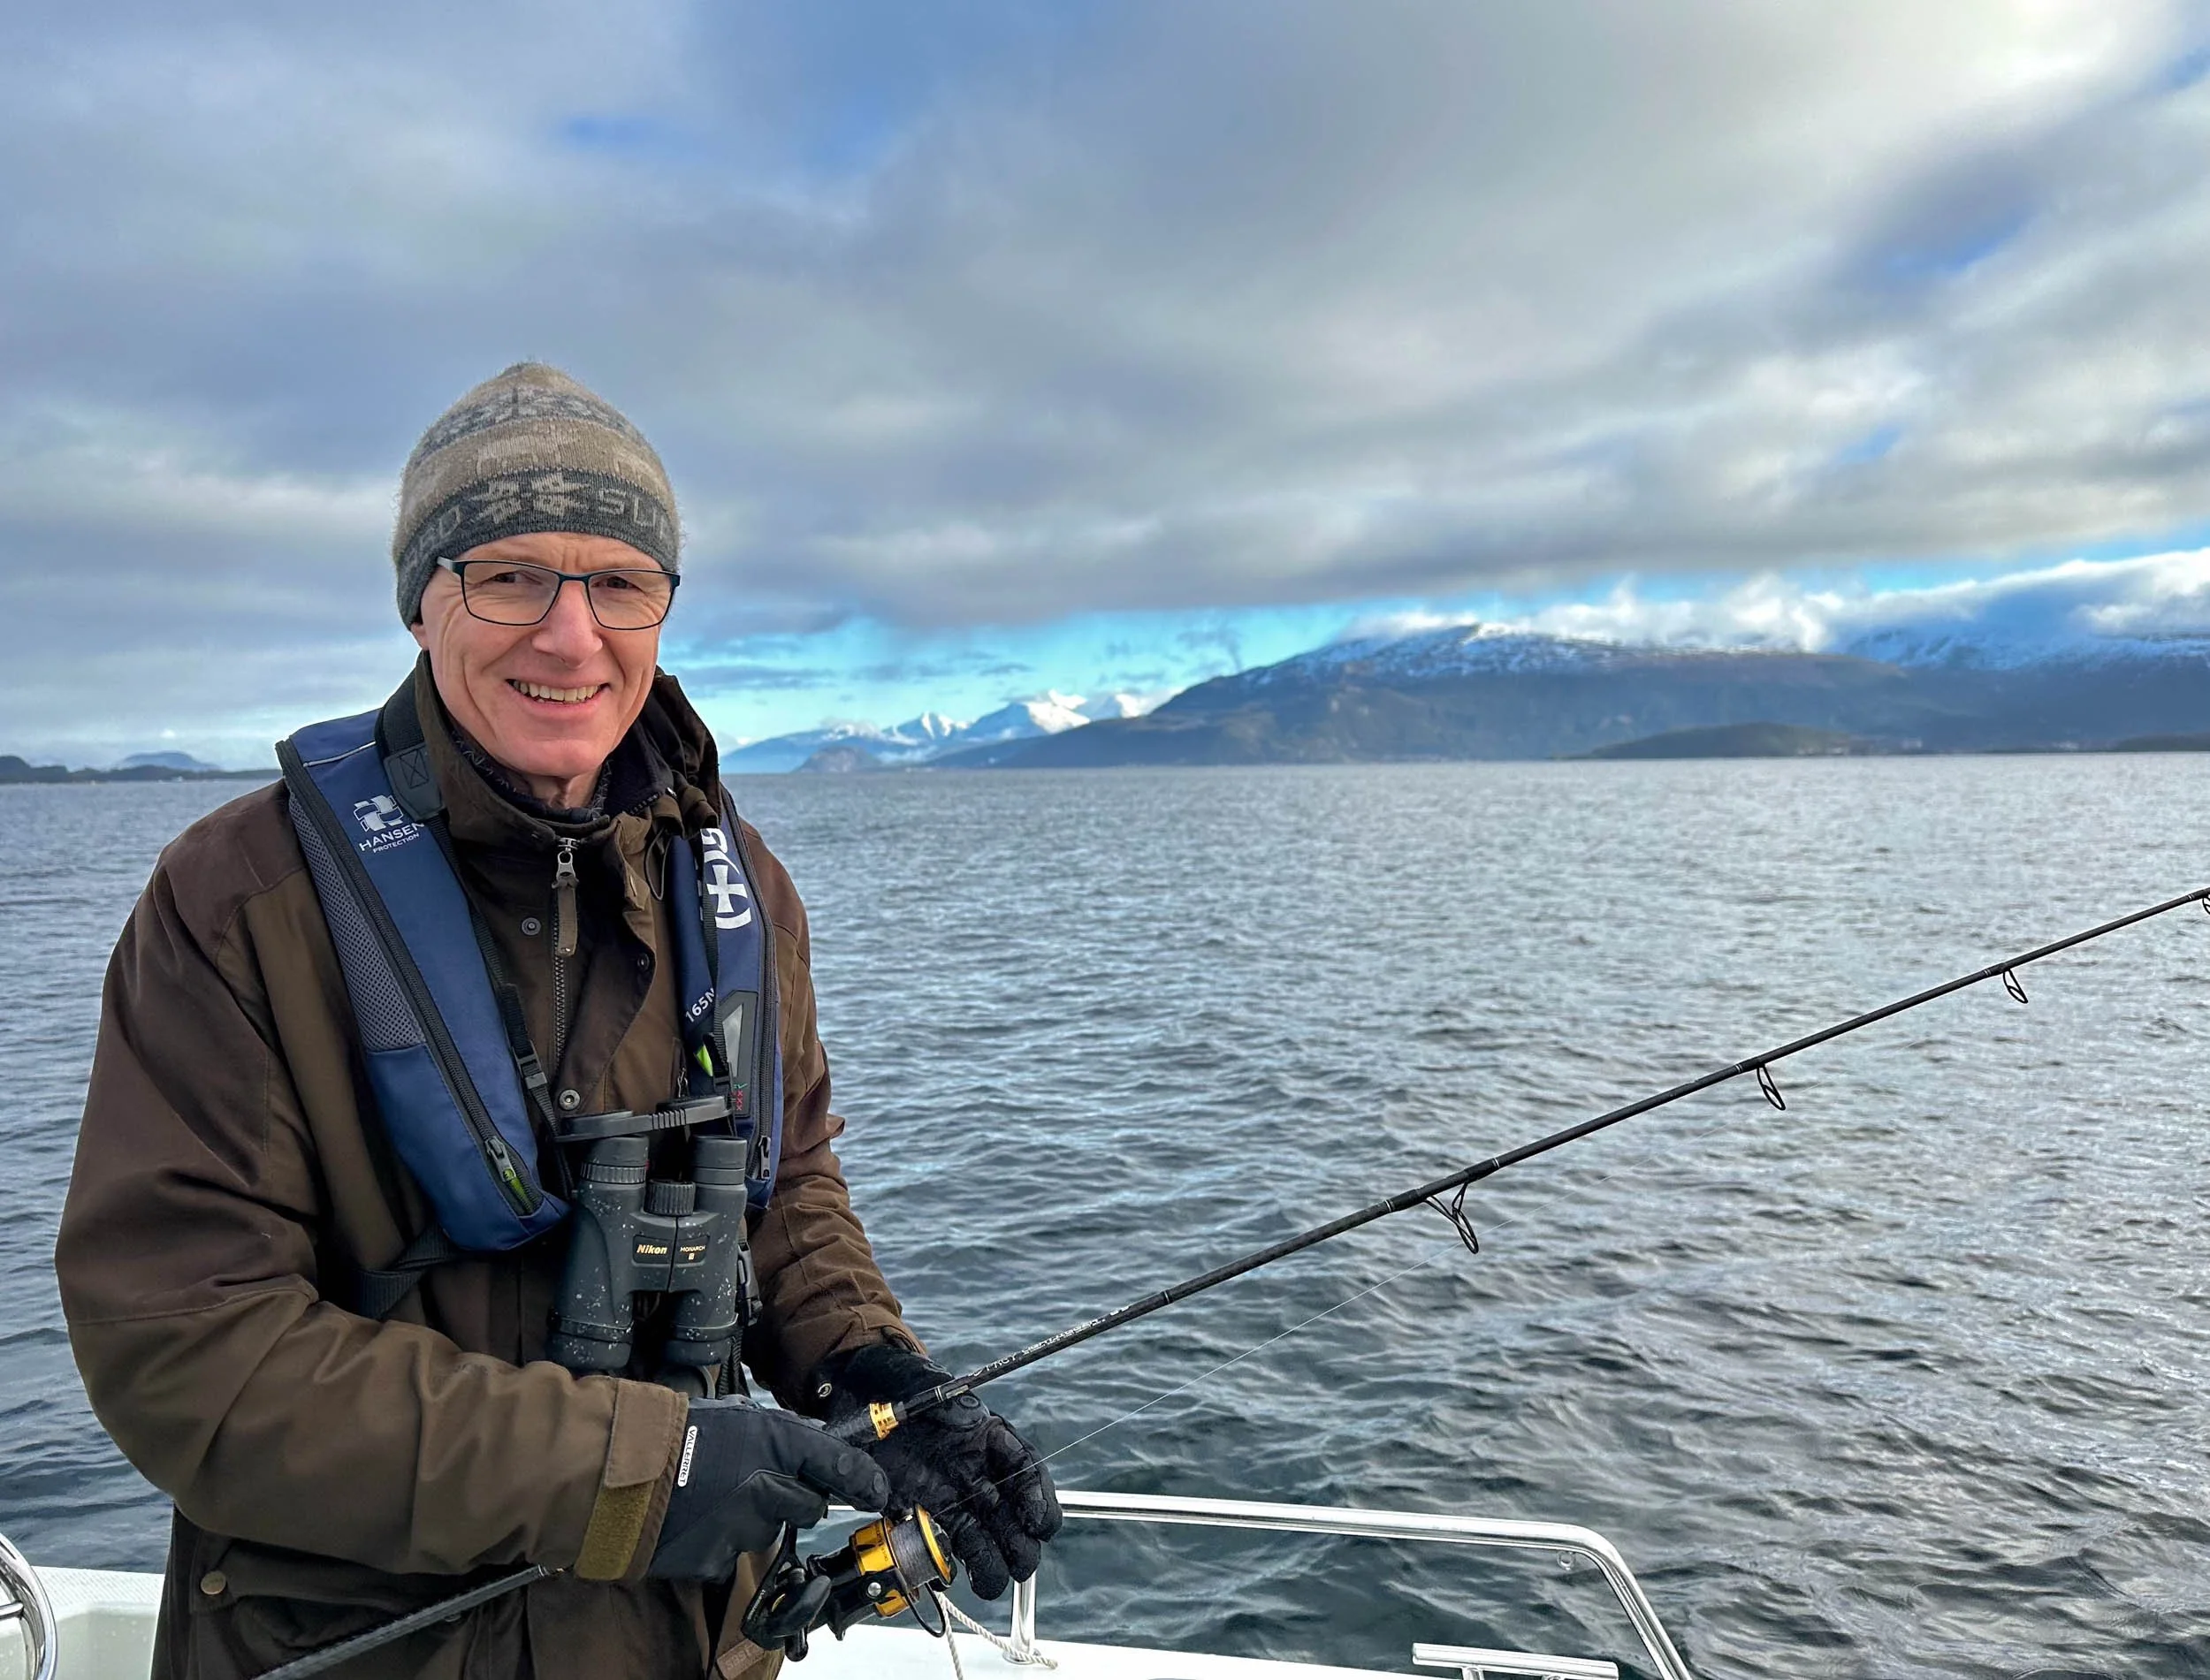
The author himself looks into the camera. Photo: Tore Idsøe.
Photographing sea eagles is fantastic fun, interesting, and educational. There’s always something new and unexpected happening on every trip, whether eagle activity is high or low. Out on the fjord, there are also other birds, especially during spring and autumn migration. The fjords of Sunnhordland are a natural paradise and invite, among other things, to landscape photography.
A sea eagle trip by boat is also balm for the soul, with plenty of fresh air, good light, and close contact with nature. Good photo companions make the trips social, and many great stories are shared in the boat. Thank you for reading this guide. Perhaps you’ll find it useful as a photographer yourself, or maybe it was just nice to read about the topic. Either way, it was valuable for me to write it!
As always, you’re welcome to leave a comment in the section below, and I look forward to seeing you in the next blog, which is guaranteed to come at some point.